Tuesday, June 25, 2013

Aquaponics and Hidroponic drip garden

Aquaponics

Aquaponics is a combination of aquaculture and hydroponics-- cultivating both plants and fish by taking advantage of their natural cycles. In aquaponics,fish produce waste and the fishy waste-water from the tank is pumped to the grow beds where plants are grown hydroponically (without soil). The plants absorb the nutrients they need from the fishy waste-water while their roots filter the water --stripping it from ammonia, nitrates, nitrites and phosphorus, which is deadly for the fish.Then, the clean water is pumped back into the fish tank, and the fish dirty it up again with their waste. This cycle continues indefinitely.

Aquaponics is environmentally friendly. There are no chemical or fertilizers needed because it is based on natural cycles that convert the fish waste into fertilizer for the plants. Also, aquaponics uses about 10% of the amount of water used in conventional farming, as water is recycled in the aquaponics system through a pump, instead of being continuously sprayed over a field. Furthermore, as aquaponics is a form of back-yard gardening, it decreases the need for imported fish and produce, which decreases the amount of gas used in transporting them. But most rewarding of all is being able to eat and enjoy your very own sustainable produce and fish.

Step 1: Materials

Here is a basic list of materials you will need to construct your own aquaponics system.

Tank We used a horse tank that was already in the barn. Other possible things to use for the tank would be IBC crates, barrels, or actual fish tanks.

Pump The most important thing--besides the fish and plants. The pump will pump the water from the fish tank to the grow bed. We obtained our pump from a thrift shop.

Grow beds Again, we used materials that were lying around in the garage. For our grow beds, we used two divided kitchen sinks (with the faucet removed), to provide a total of four grow beds. Also, we drilled holes in the grow beds so that the water would be able to drain back out into the fish tank once it is full.

Siphon The siphon will divide the water from the pump into each of the four grow beds. We simply used a PVC pipe and drilled four holes in it so that the water would flow into each of the grow beds.

Gravel We used drainage gravel (also known as red scoria) as the medium for our grow beds. This is not the same type of gravel as the gravel in the road.  It is basically crushed volcanic rock and is reddish in color. It is cheap: about $40.00 per cubic meter (ie. $20.00 for a 6x4 trailer load) and is coarse, so the water drains well. Because the gravel is small and coarse, there is way more surface area for the bacteria and roots, which means there is more room for the good stuff to happen!

Plants Most normal garden vegetables work well with aquaponics, except for root vegetables (like potatoes and carrots). This is because the roots do not have any soil to attach to. Common plants grown in aquaponics are tomatoes, okra, spinach, lettuce, cabbage, herbs, cucumbers, and even flowers.

Fish Tilapia is the most common fish used in aquaponics because they are available year round, they are easy to raise, and they taste delicious! Other fish that you can use are catfish, trout, salmon, and perch. However, you have to make sure you account for the temperature that these fish live in. For example, we could not use tilapia in an outdoors aquaponics system  in Kansas during the winter because they  cannot survive in water below 70 degrees Fahrenheit. To start our aquaponics system, we are using goldfish, which are really cheap. In our tank, we have about a dozen goldfish. Also, we put some carp that we caught at the lake into the tank. Once the nitrogen cycle levels out and our system is regulated, we will switch over to catfish from the lake so we will be able to eat both the plants and the fish.

Tools You will also need tools to drill holes.

*Note- you may not need all of the listed materials, or you may need additional materials based on your needs. Not every aquaponic system will be alike due to differences in goals, climate, and availability of materials.
http://www.instructables.com/id/Building-an-Aquaponic-System/
================================
http://www.instructables.com/id/Hydroponic-Drip-Garden-for-Vegetables-Herbs-or-Fl/
The picture below shows the two hydroponic drip systems I built that are covered by this instructable. The prototype system was built about 3 weeks prior to the taking of the picture. All the plants currently residing in the prototype are between 1 and 2 1/2 weeks old. The prototype has been working so well I build a second system for plant staging. This instructable chronicles the construction of the second system, as well as growing progress updates in Step 15.

How the System Works
The hydroponic nutrients are stored in the black plastic box. A water pump inside the box pumps the nutrients up to the drip lines at the top, thus providing nutrient solution to the grow media (clay balls in my case) and plants inside the white plastic pots. The nutrients will drain out the bottom of the plastic pots which is then collected by the recessed yellow lid that the pots sit on. Holes in the lid allow the nutrients to drain back into the black plastic box. I currently have a timer that waters the plants for 15 minutes every hour that the light is on, and then twice more during the night.

Hydroponic Systems; What is best for you?
I have been using two basic hydroponic systems: Raft and Drip. Other hydroponic systems include: Ebb and Flow, Nutrient Film, Aeroponic and Fog.
The raft system works by floating the plants right on top of the nutrient solution. An air pump and air stone are used to aerate the nutrients. The raft system is really good for growing lettuce but most plants thrive better without their roots submerged right in the nutrients.
The drip system works in much the same way that plants normally get watered. Nutrients are provided to the top of the grow media by gravity or a pump which draws much needed oxygen into the media as the nutrients drain out. This method should work well for almost any type of plant. Pump failure and cloged drip lines are the down side of this method.
The Ebb and Flow system is a popular system for home hydroponics. Pots are placed in a tub that is flooded with a couple inches of nutrients using a water pump. This waters the pots from the bottom up. After the tub is flooded, the pump is turned off and the tub drains back into the nutrient reservoir. One downside of this type of system is you need a large reservoir to hold all the nutrients necessary for flooding the tub as well as enough left over so the pump does not run dry. Like the drip system you also have the possibility of pump failure.
The Nutrient Film system works by placing the plant roots on a thin layer of flowing nutrients. From what I have read, these systems are hard to set up and thus not a good place to start for the home hydroponic enthusiast.
The Aeroponic and Fog systems work by atomizing the nutrients which the roots are sprayed with, or suspended in. This can be a very powerful method for growing plants as the atomized solution contains much oxygen, which the roots thrive in. Most of the home bought systems labeled as "Aeroponic" are not really aeroponic system though. These home systems use small fountain pumps and spray nozzles to spray the bottom of net cups and roots. The tiny fountain pumps cannot produce the kind of pressure necessary to atomize the nutrient solution so the gain over a drip or ebb and flow system are questionable. I have avoided these systems as the tiny spray nozzles seem more likely to clog than the larger drip emitters. Fog systems are fairly new and I do not know about the reliability or availability of these systems for the home hydroponic enthusiast.

Step 1: Materials Needed

Here are the items you will need:
1 - 27 gallon heavy duty plastic storage box with recessed plastic lid
10' of 1/2" PVC pipe
5 - 90 deg PVC elbows
3 - PVC T connectors
1 - 3/4" to 1/2" PVC reducer
1 - 3/4" PCV pipe to 3/4" Male Thread connector
4 - 1/2" PVC J-Hook Hangers
1 - Male Quick Disconnect to male 3/4" hose thread
1 - Female Quick Disconnect to female 3/4" hose thread
1 - 1/2" hose barb to female 3/4" hose thread
1 - rubber washer with filter screen
3' of 1/2" flexible rubber hose
1 - Active Aqua PU160 water pump
12' 1/4' O.D. drip line hose
12 - Drip stakes or drip nozzles with tie down stakes
12 - Square Plastic pots sized to fit 3 across top of tote lid
1 - 24 Hr timer with 15 minute on/off timing intervals

The first 11 items on the list were all purchased from Home Depot and can be picked up at most hardware stores. The remaining item were purchased from a local hydroponics store in Billerica MA [www.greenlifegardensupply.com]. I highly recommend them if you are local; If not most items can be picked up via the WEB or at a local garden supply shop. I purchased everything new for a total cost of about $70.

Tools Needed
Miter box and miter saw or hack saw for cutting PVC
Sand paper, small round file, or deburring tool to debur cut PVC
PVC purple primer and cement adhesive
Electric Drill with assorted bits
1" speedbor bit or 1" hole saw
Awl or Nail to place drill starting mark in PVC
Utility knife

Hydroponic Supplies Needed
Your choice of hydroponic nutrients (I'm using Botanicare Pure Blend Pro)
Your choice of grow media (I used about 15 liters of clay balls)

Tuesday, June 18, 2013

Rocket stove

One blogger took a super-efficient stove design that's been embraced in the developing world and applied it to heating up his living room. Read about how he did it here.
Fri, Oct 26 2012 at 2:04 PM
Photo: Yuichiro Haga/Flickr
I'm a huge fan of the rocket stove (I wrote about it earlier this year), a hyper-efficient design that excels at burning at very hot temperatures. Rocket stoves burn at much higher temperatures than your standard wood-stove or fireplace and, as a result, emit much cleaner exhaust. You can burn just about anything in a rocket stove too, from straw to dried dung to small bundles of twigs. This flexibility, combined with the stove's brutal efficiency, has made them a popular choice in the developing world, where they replace older conventional stoves that are smoky and inefficient. Smoky kitchens are no joke in many parts of the world and negatively impact the health of millions of people. Rocket stoves means people can breathe easier as they prepare food and have to work less to procure fuel.
I stumbled across this great article showing how one blogger installed a rocket stove heater to help heat his home. Rob the blogger is a woodworker who had an ever-growing pile of small scrap wood accumulating in his workshop. Instead of mulching the scraps or sending them off to a landfill, he wanted to extract as much energy as possible out of his pile and converted an old water tank to a rocket stove.
Swing over to I Will Try to read about his project and to see more photos.
If you have a few minutes, watch this delightful little video showing a rocket stove heater in action.

Monday, June 3, 2013

Acabado de superficies de madera


Proceso de Barnizado 
Proceso de Tintado
Preguntas frecuentes  -  barnizparaguitarras.com


¿Cuál es mejor acabado, Nitro o Poliuretano?
Depende de las prestaciones que busquemos en el acabado final de nuestra guitarra.
Nitro: Fusión entre capas, mejor sonoridad, aspecto “vintage”.
Poliuretano: Más cubrición, dureza y resistencia. Más durabilidad.
¿Puedo diluir con agua el tinte concentrado rápido? ¿Cuánto se puede diluir los tintes concentrados?
No, no se debe diluir con agua por riesgo de precipitación de los pigmentos y deficiente dispersión del color. Como máximo se podría poner un 15% de agua a la mezcla del colorante y el 540421 Disolvente Evaporación Media.
Los tintes concentrados admiten una gran dilución siempre que se utilice el disolvente recomendado; nuestra recomendación general máxima sería hasta 20 partes de disolvente por una de tinte concentrado, aunque según el color se podría diluir incluso más.
Para aplicar el tinte concentrado, ¿puedo aplicarlo mezclado sólo con el disolvente y luego dar un acabado final de laca transparente, o el tinte diluido tiene que ir mezclado ya con la laca? ¿Cómo se recomienda aplicar los tintes, sobre madera, sobre sellador o sobre acabado?
Los dos métodos son válidos, pero nuestra recomendación técnica es siempre aplicar el tinte diluido primero sobre la madera, ya que obtenemos mayor viveza y marcado del color de la chapa; además cuando coloreamos la laca corremos el riesgo de crear un bordón de color en los laterales de la guitarra, debido a la acumulación excesiva de producto.
Por otro lado, cuando entonamos el acabado con algo de color, difuminamos los posibles pelados en el lijado, igualando el color en el soporte. Además para conseguir efectos tipo “sunburst”, necesitamos de forma obligatoria entonar el acabado.
Cuando en los tintes concentrados señalan la proporción 5/1 ¿Qué significa?
Define la proporción de dilución que se ha realizado; concretamente 5/1 significa que la mezcla tiene 5 partes de disolvente por una de tinte concentrado.
¿Porqué cuartea la laca nitro?
La nitrocelulosa, cuartea por varios motivos: Por mala calidad del producto, por exceso de aplicación y por no respetar los tiempos de aplicación entre capa y capa. No se recomienda aplicar más de una o dos manos por día.
¿Qué lija es la adecuada para lijar la madera del cuerpo de la guitarra?
Para lijar madera siempre se recomienda comenzar por lijas de mayor grosor 120 -180 para ir bajando el grano de la lija progresivamente hasta por lo menos 240 o 400. Cuanto más fino dejemos la superficie, mejor quedará el acabado final del instrumento.
¿Es diferente la lija para productos base agua que para productos base disolvente?
Sí, aunque podríamos gastar la misma lija, el resultado no sería óptimo. Las lijas para productos base agua no llevan granos, sino una superficie estructurada  a base de estearato, con el fin de no rayar la superficie, ni sobre calentar el producto en exceso.
¿Cuántas manos de acabado nitro hay que aplicar y con qué frecuencia, para un óptimo acabado de la guitarra? ¿Cuántos botes de spray necesito para pintar una guitarra?
Para una guitarra nueva con la madera en crudo se recomienda aplicar entre 6 y 9 manos de acabado aplicado a base de manos finas, y con una periodicidad de máxima de una o dos manos diarias. Si aplicamos el producto en spray hay que tener en cuenta que obtendremos una menor cubrición por mano aplicada que si aplicamos de forma convencional, por lo que recomendamos aplicar entre 9 y 12 manos de producto. Con un bote de 400ml de capacidad, podremos dar entre una y dos manos a la guitarra.
¿Ventajas del producto base agua?
Los productos base agua tienen la gran ventaja de la facilidad de aplicación, uso y limpieza. Nos permiten trabajar en zonas habitadas ya que no evaporan disolventes, eliminando olores y disolventes al medioambiente. Marcan de forma excelente la estructura del soporte, ofreciendo un aspecto natural y un tacto extremadamente sedoso. Poseen una gran elasticidad, por lo que nos evitan los temidos cuarteos.
¿Consigues el mismo acabado final con un acabado envasado en spray, que el mismo acabado aplicado con pistola?
Sí, siempre que tengas en cuenta que el número de manos a aplicar con spray siempre será mayor que con la aplicación a pistola. Y termines el proceso final con el recomendado pulido.
¿Se puede aplicar acabado nitro sobre goma laca?
Sí, se puede aplicar, pero recomendamos que se limpie y lije bien toda superficie antes de realizar el proceso de lacado para evitar problemas de adherencias.
¿Se puede aplicar acabado nitro sobre pintura acrílica?
Sí, pero recomendamos también realizar el obligado lijado de toda la superficie.
¿Qué es la nitrocelulosa?
Es un sólido parecido al algodón, o un líquido gelatinoso ligeramente amarillo o incoloro con olor a éter. Se emplea en la elaboración de explosivos, propulsores para cohetes, celuloide (base transparente para las emulsiones de las películas fotográficas) y como materia prima en la elaboración de pinturas, lacas, barnices, tintas, selladores y otros productos similares. Es famoso su uso tradicional como laca nitrocelulósica aplicada como acabado sobre la madera en guitarras eléctricas de calidad como ocurre con las guitarras Gibson
¿Qué es la Goma laca?
La goma laca es una sustancia orgánica que se obtiene a partir del residuo o secreción resinosa de un pequeño insecto rojo llamado gusano de la laca, (Laccifer lacca) que habita en lugares del sudeste asiático como Indonesia o Sri Lanka. Las dos mejores variedades en el mercado son la goma laca de color naranja, que viene en forma de escamas finas y traslúcidas y la goma laca blanca. Ambas, tanto la blanca como la de color naranja son solubles en alcohol.
¿Qué clase de pasta de pulir hay que utilizar para el acabado final?
Existen diferentes pastas de pulir en el mercado, pero nuestra recomendación general será utilizar una pasta de pulir más agresiva en el proceso inicial para eliminar la suciedad e imperfecciones de mayor tamaño, y posteriormente usar una pasta de pulir fina para conseguir el brillo final.
¿Es necesario pulir?
Sí, recomendamos pulir los acabados con las siguientes premisas:
a) Puliremos un mes después de aplicar la última mano de acabado.
b) Trabajaremos con varias pastas de pulir (guesa y fina).
c) No haremos excesiva presión para no sobre-calentar la laca.
d) No inclinaremos la pulidora para no pelar el acabado.
Podemos conseguir subir el brillo entre 5 y 10 puntos cuando pulimos, además de dejar la superficie más fina  y sin imperfecciones.
Para aplicar producto en base agua con equipo HVLP ¿Qué dilución es la recomendada y qué tipo de boquilla de pistola debo usar?
Si, no hay problema. De todas formas aconsejamos que los productos base agua deben aplicarse siempre con boquilla fina (6-9) y con alta presión de aire (3kg) para una correcta atomización del material sobre la superficie.  Los productos en base agua tienen la ventaja de la facilidad de uso, cuando aplicamos una mano de barniz sobre la pieza y está se pone un poco azulada, es cuando nos avisa que hemos aplicado ya la cantidad máxima por capa. Una vez evapora el agua, la película queda estirada y perfectamente transparente.
¿Puedo aplicar directamente al cuerpo de la guitarra el acabado nitro blanco o incoloro, o debo de aplicar un sellador?
La función de los selladores es tapar los poros y preparar la superficie para las capas posteriores del acabado. Por lo que si nuestra madera no está suficientemente fina, o posee mucho poro, o queremos sellar la chapa con menos manos de producto, utilizaremos sellador de fondo. Si no es el caso, preferimos utilizar únicamente el acabado en varias manos de aplicación, para conseguir una mejor transparencia y mojabilidad.

Thursday, May 23, 2013

Table Saw from a Circular Saw Redone

http://www.instructables.com/id/My-Table-Saw-from-a-Circular-Saw-Redone/
I bought a good circular saw and hung it below a piece of 3/4 inch plywood. I added a couple of my own innovations, and it could do very precise work. I could also remove the circular saw to rip a panel too large for my table saw, and put it back into my table saw without the need to align it again. I no longer have that circular saw or the table I made. See how I made that table saw here.
But, I wanted to have a table saw again and wanted to utilize my Porter-Cable circular saw (Model # PC15TCSMK). This saw has a rigid base that does not flex easily, a 13 amp motor, and almost no run out to change the line of cut when the motor starts.
What I do not have is a lot of space to store a table saw, so I wanted a saw that almost stores flat. See the second photo. When I want to use the saw, I back my car out of our garage and set up my saw near the open door on folding sawhorses.
Materials
  • 3/4 inch plywood 29 x 48 inches for the saw table
  • 3/4 inch plywood for the fence and the face of the miter gauge
  • Steel bar 1/4 x 2 inches and 1/4 x 3/4 x 24
  • 1/4 inch and 5/16 inch threaded rod
  • 8-32 machine screws about 1 1/2 inches in length
  • Various nuts and washers
  • 3/4 inch water pipe
  • Angle iron from an old bed frame
  • Steel fence post
  • Steel electrical boxes and covers for a switch and an outlet
  • Three 3/8 inch romex connectors
  • 15 amp duplex outlet and 15 amp toggle switch
  • Twist on wire nut
  • Three prong male plug
  • 16-3 rubber covered wire
  • Round steel bar to make the collar in step 2
  • Concrete reinforcement bar for the carrying handle
  • 1/4 inch plywood
Tools
  • Circular saw
  • Radial arm saw
  • Dado blade (adjustable)
  • Framing square
  • Folding rule
  • Router
  • Handheld Drill
  • Drill press
  • Welder
  • Angle head grinder with a cutting wheel and a grinding wheel
  • 3 pound hammer
  • "C" clamps
  • Plywood straightedge guides
  • Pliers
  • Screwdrivers
  • Files
Step 1: First step: cut the miter gauge slots
The miter gauge slots need to fit the miter gauge's steel bar precisely. I used an adjustable dado blade with carbide tips to dial in the exact width of the 1/4 x 3/4 inch steel bar I planned to use for the miter gauge. I made test cuts in some scrap lumber. In the process I learned two bars may be classed as 1/4 x 3/4 inch, but one is a bit narrower than the other. I cut my slots to fit the piece of steel I would use.
I also have a radial arm saw now. One capability of a radial arm saw is using the edge of the table nearest the operator as a cutting guide together with a straightedge clamped to the bottom of the work piece. I described that process in this Instructable. I have a piece of 3/4 inch chipboard about 4 inches wide and 36 inches long. It has very straight parallel edges on both sides. I clamped it under the piece of plywood you see in the photo. It was positioned midway between the two slots in the table and was parallel to them. All I had to do was set the depth of the dadoes and hold the plywood firmly on the table while cutting one slot and then turning the plywood end for end to cut the second slot. The process is almost failure proof and the finished product is very accurate.

Hydroponics

http://www.instructables.com/ channel-hydroponics/
 The-72-Plant-Vertical-Garden/
Easy Aquaponics from "mostly" re-purposed materials
by damionflynn
Download

Okay folks - let me have it. My first Instructable was some time ago and it wasn't much so I thought to myself, "how can I really bring some value to the community" and this is what I came up with. My son (15) and I built this over two weekends. Granted, if you had the supplies ready and handy, you could easily do it in a day if you really hunkered down.
Without further delay, I present to you our (roughly) 200 gallon aquaponics system, built from re-purposed wood, a cheap pond kit, some PVC, and lava rocks.


Step 1: Tearing down the old raised beds and getting the base built


What really prompted this project was the fact I was getting very tired of the fire ants getting into my raised beds. After losing much of my crops to ants, I decided I was going to grow in water via hydroponics. Then, I learned about Aquaponics and it was on.
Thanks to the help of my son, all of the 6" screws were taken out of these timbers, we cut them to size and ultimately built a smaller version for the tank and used some of the pieces for legs and supports on the grow bed. It is worth noting that we were able to reuse most of the screws that came out of the timbers as well so I did not have to buy any.
The size of my grow bed and the size of my tank were based on mathematical calculations made by me based on the amount of pond liner I had available to me. I bought the kit (see picture) on Craigslist for $25 - it was still brand new in the box. The liner was 8x10 so I had to figure on how much I could use of this. I elected to build a tank that was 2x7 x18" deep and row bed was 1x7 x1' deep for optimal root space. Of course, if you are using a different size liner, just keep in mind that your depth will take off length and width from ALL sides (if you go 1' deep, you need to take off 2' from length and width, which works out to 1' all the way around)

Reclaimed Wood Flat-Pack Picnic Table With Planter/Ice Trough

http://www.instructables.com/id/Reclaimed-Wood-Flat-Pack-Picnic-Table-With-Planter/


Here's our Reclaimed Wood Flat Pack Picnic Table With Planter (I know. It's a mouthful). There is a gutter running down the center below the tabletop surface that can be filled with ice to put your beers in on a hot day, or for planting herbs (reach across the table to get the freshest seasoning for your food) or decorative plants.

Making this table flat-pack was an easy decision: neither of us has a truck.  The table was made in pieces: two ends that provide the structure for the table, two center pieces with the tabletop slats, the trough, and the removable legs that simply screw in place.   Disassembly and reassembly take minutes, and everything can be fit in the back of a compact car.

All the wood in this project is reclaimed except for the table legs, which were purchased from Discount Builder's Supply in San Francisco.  As always, the design was influenced by the materials: we would have made the slats go lengthwise, but most of the beautiful pieces of reclaimed redwood we had were short, so they're widthwise instead.

At the time we made this table, we didn't have access to a jointer or planer, so we sanded our reclaimed wood with palm sanders.  The whole project took us about a week, but it would take far less time with a jointer and planer.

This was made at TechShop San Francisco, TechShop Menlo Park, and in the backyard.  It was inspired in part by Far Out Flora's Succulent Table and Ana White's Outdoor Dining Table.

Note: this Instructable is for the table only.  Another Instructable, for the two matching benches, is coming soon!

Step 1: Materials and Cutlist
The tabletop is 60 inches by 41 inches.  Our trough is 5 inches wide.

Reclaimed Wood:

Tabletop: Wood of varying widths, enough to cover a tabletop that is 60"x41", accounting for small gaps between each slat.  These pieces will all be cut in half, and end up being 1"x any width x 17".

     There are also two tabletop end-pieces that are longer.  These are listed below, under "Outer Aprons".

Table Structure:
     2 Inner Aprons:
          (4) 1x4x64 1/2"  (long apron pieces)
          (4) 1x4x10"        (short inner endpieces of the apron)
          (4) 2x4x10"        (table leg supports)

     2 Outer Aprons
          (2) 1x4x25"         (outer end pieces of the apron)
          (2) 1x any width x41" (Long tabletop slats)

[Note: 1x and 2x mean wood that is "one inch" thick and "two inches" thick.  However, that is their nominal size.  A 1x board is usually around 3/4" thick when measured.  1x boards all used to be one inch, but in order to make them flat, a sawmill had to remove some of the thickness.  Generally, when naming the size of a board, the thickness comes first, then the width, then the length, as in 1"x3"x11".  The x-es stand for "by", so you would say, "One by three by eleven".]

Salvaged length of gutter or trough: 6 feet.  You can also use any old bendy sheet metal if you have it.

Table legs and leg attachment hardware: Throughout our project, we looked for some beautiful old table legs, but weren't able to find any.  We bought ours from a hardware store.  They were screw-in legs with metal top plates that attached to the table top.  They were easy to install, but not as sturdy as we'd like.  If we were to go it again, we would come up with an alternative way to attach the legs to keep them removable, but still sturdy.

Hardware:
Screws: a box of 1 1/4" and a box of 2".  Make sure your screws are outdoor friendly: I used decking screws.

I used a nail gun with 1 1/2" nails and wood glue to attach the top slats to the tabletop supports.  If you don't have that, I recommend using screws and a screw gun.

(8) 3/8" bolts, with one nut and two washers for each.

Planters: Strawberry Pallet Planter

http://www.instructables.com/id/How-to-Make-a-Better-Strawberry-Pallet-Planter/step3/Cut-the-pallet-into-three-equal-pieces/
http://www.instructables.com/tag/type-id/category-workshop/keyword-planter/

Pallets - paletas

Monday, May 6, 2013

The Liberator

http://www.heise.de/newsticker/meldung/The-Liberator-Erste-komplette-Waffe-mit-3D-Drucker-hergestellt-1838891.html

Die gedruckten Teile des Liberators Vergrößern
Bild: Defense Distributed

Makerbot löscht 3D-Vorlagen für Waffenteile
Lizenz zur Waffenproduktion mit 3D-Druckern erteilt
Waffenherstellung mit 3D-Drucker

Das South by Southwest Festival in Austin, Texas hat seinen Themenbereich in den letzten Jahren erweitert. Ursprünglich nur auf Musik und Film ausgelegt, bietet das SXSW in diesem Jahr über einhundert Veranstaltungen zum Thema DIY. Dazu gehört auch der Themenbereich 3D-Druck. Ungewöhnlich ist, dass Cody Wilson für einen Vortrag zum Thema 'Gun Printing' eingeladen wurde. Wilson ist der Gründer der Gruppe Defense Distributed, die Informationen über die Nutzung von 3D-Druckern für die Waffenherstellung sammeln und verbreiten will.
Defense Distributed ist eine Nonprofit-Organisation, deren Ziel es ist, die Herstellung von Feuerwaffen mit 3D-Druckern für alle zugänglich zu machen. Eine Sammlung von entsprechenden 3D-Designs, die Dokumentation von Tests und die Suche nach der günstigsten Form des Drucks sind die Inhalte, die die Aktivisten verbreiten möchten. Zweck der Organisation soll es sein, herauszufinden „wie sich Regierungen verhalten, wenn sie davon ausgehen müssen, dass alle Bürger fast unmittelbaren Zugang zu einer Waffe […] haben“.
Seinen Vortrag auf dem SXSW hat Cody Wilson dafür genutzt, vorzuführen, welche Designs für Waffen schon vorhanden sind und zu kritisieren, dass sein Anliegen von anderen 3D-Druck-Anbietern nicht gutgeheißen wird. Die Annahme des Jura-Studenten ist, dass die Verwendung von 3D-Druckern für die Waffenherstellung unvermeidbar ist. Da, so Defense Distributed in seinem Blog, die Maker sich mit dem Thema nicht auseinandersetzten, würde seine Organisation dies tun. Das Magazin Wired hat ihn Ende des letzten Jahres auf Platz 14 seiner Liste der 15 gefährlichsten Menschen der Welt gesetzt. Die bisher rund 100 verfügbaren Waffen-Designs wurden seit Dezember 2012 circa 400.000 Mal herunter geladen. Defense Distributed hat sich um eine staatliche Lizenz für die Waffenherstellung beworben. (esk)
==============
 http://allthingsd.com/20130311/3-d-printed-gun-maker-speaks-out-at-sxsw-theyre-real-and-theyre-not-going-anywhere/
=============
http://en.wikipedia.org/wiki/FP-45_Liberator

FP-45 Liberator
M1942 liberator.jpg
The FP-45/M1942
Type single-shot pistol
Place of origin  United States
Service history
In service 1942-1945
Used by dropped into occupied territories for use by insurgents
Wars World War II
Production history
Designer George Hyde[1]
Designed May 1942[1]
Manufacturer Guide Lamp Corporation of General Motors Corporation[1]
Unit cost $2.10 (1942)[1]
Produced June 1942-August 1942[1]
Number built 1,000,000
Specifications
Weight 1 lb. (454 g)
Length 5.55 in. (141 mm)
Barrel length 4 in. (102 mm)

Cartridge .45 ACP
Action single-shot
Muzzle velocity 820 ft/s (250 m/s)
Effective range 8yds
Feed system single shot
The FP-45 Liberator was a pistol manufactured by the United States military during World War II for use by resistance forces in occupied territories. The Liberator was never issued to American or Allied troops and there is no documented instance of the weapon being used for their intended purpose. Many FP-45 pistols were never distributed and were destroyed by Allied forces after the war; and most of those distributed were lost or disposed of without any combat use.[1]

Contents

Project History

FP-45 Liberator on display in Les Invalides
The concept was suggested by a Polish military attache in March 1942. The project was assigned to the US Army Joint Psychological Warfare Committee and was designed for the United States Army two months later by the Inland Manufacturing Division of the General Motors Corporation in Dayton, Ohio. Production was undertaken by General Motors Guide Lamp Division to avoid conflicting priorities with Inland Division production of the M1 carbine.[1] The army designated the weapon the Flare Projector Caliber .45 hence the designation FP-45. This was done to disguise the fact that a pistol was being mass produced. The proposed intent was to drop these weapons at concentration camps where internees would pick up these weapons overcome Nazi Guards and hopefully liberate the camp. The original engineering drawings label the barrel as "tube", the trigger as "yoke", the firing pin as "control rod", and the trigger guard as "spanner". The Guide Lamp Division plant in Anderson, Indiana assembled a million[2] of these weapons. The Liberator project took about 6 months from conception to end of production with about 11 weeks of actual manufacturing time, done by 300 workers.
Liberator-Left.jpg

Design

The FP-45 was a crude, single-shot pistol designed to be cheaply and quickly mass produced. The Liberator had just 23 largely stamped and turned steel parts that were cheap and easy to manufacture. It fired a .45 caliber pistol cartridge from an unrifled barrel. Due to the unrifled barrel, it was intended for very close ambush (1-4 yds). Its maximum effective range was only about 25 feet (less than 8 m). At longer range, the bullet would begin to tumble and stray off course. Because of the low quality, it was nicknamed the "Woolworth gun."
Liberator-Right.jpg

Wartime use

The Liberator was shipped in a cardboard box with 10 rounds of .45 ACP ammunition, a wooden dowel to remove the empty cartridge case, and an instruction sheet in comic strip form[3] showing how to load and fire the weapon. Extra rounds of ammunition could be stored in the pistol grip. The Liberator was a crude and clumsy weapon, never intended for front line service. It was originally intended as an insurgency weapon to be mass dropped behind enemy lines to resistance fighters in occupied territory. A resistance fighter was to recover the weapon, sneak up on an Axis occupier, kill or incapacitate him, and retrieve his weapons.
The weapon was valued as much for its psychological warfare effect as its actual field performance. It was believed that if vast quantities of these weapons could be delivered into Axis-occupied territory, it would have a devastating effect on the morale of occupying troops. The plan was to drop the weapon in such great quantities that occupying forces could never capture or recover all the weapons. It was hoped that the thought of thousands of these unrecovered weapons potentially in the hands of the citizens of occupied countries would have a deleterious effect on enemy morale.[4]
General Eisenhower's staff never saw the practicality in mass dropping the Liberator over occupied Europe, and authorized distribution of fewer than 25,000 of the half million FP-45 pistols shipped to Great Britain for the French resistance. Generals Joseph Stillwell and Douglas MacArthur were similarly unenthusiastic about the other half of the pistols scheduled for shipment to the Pacific. The Army then turned 450,000 Liberators over to the OSS. Resistance fighters in both theatres were supplied with more effective weapons whenever possible, and French use of the FP-45 remains undocumented; although OSS distributed a few to Greek resistance forces in 1944. 100,000 FP-45 pistols were shipped to China in 1943, but the number actually distributed remains unknown. A few were distributed to Philippine troops under the Commonwealth Army and Constabulary and resistance fighters.[1]

Firearms collectors

The original delivered cost for the FP-45 was $2.40/unit[3] ($32 in 2010). A Liberator in good condition today can fetch approximately $1200, with the original box bringing an additional $500, with an original extremely rare paper instruction sheet the value could exceed $2000 to a collector of rare World War II militaria. Fakes of these sheets exist, but authentic copies have a watermark that can be seen clearly, which is difficult to duplicate.

The Concept Revived
The Liberator was replaced with the Deer gun in 1964 when a modernized equivalent was designed for possible use in Vietnam.[3] This was because the CIA needed a weapon of this type, and most Liberators were scrapped after World War II. The Deer Gun was chambered for 9x19mm Parabellum and was loaded by unscrewing the barrel and inserting a round to fire.

References


Friday, April 12, 2013

Meteorological station

http://en.wikipedia.org/wiki/Weather_station
A weather station is a facility, either on land or sea, with instruments and equipment for observing atmospheric conditions to provide information for weather forecasts and to study the weather and climate. The measurements taken include temperature, barometric pressure, humidity, wind speed, wind direction, and precipitation amounts. Wind measurements are taken as free of other obstructions as possible, while temperature and humidity measurements are kept free from direct solar radiation, or insolation. Manual observations are taken at least once daily, while automated observations are taken at least once an hour. Weather conditions out at sea are taken by ships and buoys, which measure slightly different meteorological quantities such as sea surface temperature, wave height, and wave period. Drifting weather buoys outnumber their moored versions by a significant amount.
 
Method of representing information collected by an observation station on a weather map using symbols and numbers.
http://www.wunderground.com/weatherstation/about.asp
http://www.ehow.com/how_4876490_build-homemade-weather-station.html
http://www.salemclock.com/weather/weather01.htm
Building and Using a Homemade Weather Station 
Introduction | Wind Vanes | Barometers | Hygrometers | Anemometers | NephoscopesRain Gauge | Snow Gauge | TV Weather | Charting | Forecasting | Cloud In A Jar
Snow Water | Weather Station | Storm Tracking | Rain In A Jar | Frost In A Can
IntroductionIt doesn’t matter whether you’re only eight or well past eighty! Building a simple, homemade weather station and learning to use it to make accurate forecasts can be very interesting and a whole lot of fun. It’s rough science at its best!
But, why do that in this day and age of satellites, Doppler radars and computer-generated weather models, the information from these being available on TV or the Internet instantly?
Well, for one thing, you can be as accurate in local, short-range predictions as the people with all that multi-million dollar gear. How about that?
As projects for the 2003 California Science Fair one student compared traditional folk methods of weather prediction with scientific methods and two other students did research on the accuracy of local professional forecasts. Read about them both here.
In the tests of the traditional folk methods, they scored 34 correct predictions out of 42total.The scientific method produced 35 correct predictions out of 42. The control (the Los Angeles Times) scored 35 correct predictions out of 42.
What I found the most interesting about this experiment, was that folks armed with nothing more than a short poem, a peek at the moon, and a couple of surplus pinecones, were virtually as adept as the pros at the LA Times! Score one for the folks!
If you want to learn about the weather, an excellent place to start is with theForecasting The Weather section. Then, using cheap or free materials, you will learn to build and understand:
· A wind vane (surface wind direction)
· 2 different barometers (atmospheric pressure)
· 2 different hygrometers (humidity and relative humidity)
· 3 different anemometers (surface wind speed)
· 2 different nephoscopes (clouds & winds at high altitude)
· A rain gauge
· A snow gauge
Then, you will learn how to:
· Set up your home weather station
· Chart your readings and data
· Watch local TV weather forecasts in a new way
And while you’re doing the above, have fun with these simple experiments:
· Create a cloud in a jar
· Measure the water content of snow
· Determine the distance of a thunderstorm
· Make it rain in a mayonnaise jar
· Make dew and frost in tin cans
These experiments will give you an internalized understanding of important processes involved in the operation of the heat-driven engine that we call the weather.
This is all well worth doing. It connected me more with the non-verbal world of nature by focusing my attention each day on the forces of sun, wind, and water, and broadened my understanding of an important and literally huge part of the world in which we live.
You can do things in any order. You don’t have to build all three anemometers or both nephoscopes, for example; just pick what’s right for you.
If you’re a parent with children still at home, this is a great way to connect. If you’re a child with parents still at home, this is also a great way to connect.
If you are living alone, or if you live with someone who thinks that puttering with sticks, bottles, tin cans and what-not is utterly bats, you can treat this as a form of brave, spiritual journey into great and arcane forces which places you head-and-shoulders above mere mortals...and If nothing else...it’s a great way to kill a rainy day!
http://www.scientificsales.com/=======================
Weather Stations
From the hobby weather watcher to the most radical storm chaser, one of our weather stations will meet your needs.
If you're not sure where to start, try our Help Choosing a Davis station page.
View the Wireless Vantage Vue station and accessories at VantageVue.com. This station provides accurate, reliable weather monitoring in a self-contained, easy-to-install system. Perfect for home, school, or business.
arrow imgCompare Vantage Pro2 to Vantage Vue.
Davis Vantage Pro2 Weather Stations
If you're looking for a superior weather station, the Davis Vantage Pro2 Weather Station is as good as they come! The quality of this unit is apparent from the moment you first open the box.
Starting At: $429.95
 http://www.weathershack.com/listing/complete-home-weather-stations.html
================================ 
http://www.amazon.com/b?ie=UTF8&node=397435011
Product Details

Ambient Weather WS-2080 Wireless Home Weather Station

http://www.ebay.com/sch/i.html?_trksid=p2050601.m570.l1311.R1.TR3.TRC1&_nkw=home+weather+station
NEW★COMPLETE SET★TOUCHSCREE​​N★SOLAR★1YR WARRANTY★BONUS

$109.75

Buy It Now!
===========================
http://www.ebay.de/sch/i.html?_odkw=meteorologische+messstation
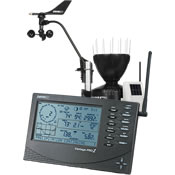
Statistik Analyse großes 17,5cm Farb Display
Vergrößern
EUR 199,99
+ EUR 5,99
Kaufen Sie bei Verkäufern mit Top-Bewertung und profitieren Sie von kurzen Versandzeiten und exzellentem Service.

Neueste Revision 868mhz Touchpen PC Auswertung
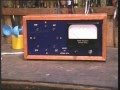
Vergrößern
EUR 99,99
+ EUR 5,99 
Kaufen Sie bei Verkäufern mit Top-Bewertung und profitieren Sie von kurzen Versandzeiten und exzellentem Service.


http://www.testberichte.info/wetterstation?kid=testberichte5-21&gclid=CLqgspPwxrYCFRR8nAodLW4AgQ

Wetterstation Testsieger (Mejor modelo designado)


Testsieger Wetterstation

TFA 35.5015.IT Eos Max

Auch die Vorhersagen der Funktwetterstation stimmten meistens mit der Realität überein, wobei die langfristigen Prognosen natürlich zunehmend ungenau sind. Des Weiteren scheinen die Werte ständig aktualisiert zu werden.
Bewertung: Bewertung: 4 Sterne    |    3 Testberichte    |   28.09.2010

========================

http://youtu.be/at7mLj6kLSc