Showing posts with label woodworking. Show all posts

Monday, November 26, 2012

Making simple drawers and dividers

http://youtu.be/BMttGC1E3Cs
use stiropor o foam board (High Density)
http://youtu.be/_pTWvPBP6Ps
There are a number of ways in which to build a drawer box, like dovetailing, rabbeting, half- lap, offset tongue and groove etc. each has it's own advantages and disadvantages. Biscuit joinery can easily overcome some of those limitations and yet deliver a sound, usable result.

Plywood cutting table

http://youtu.be/vMmFEfXkeyc
 that sits on top of sawhorses, this things makes cutting plywood so much easier.
It is made out of 5/8" plywood and can also be used for an extra work surface with just a sheet of plywood laid on top.
It's easy to build this plywood cutting table, just plywood, glue and brad nails. It is made to sit on top of my Folding Sawhorses which you can find in another of my videos here, http://www.youtube.com/watch?v=_Zr-vdnQiRU. It can be made to fit onjust about any sawhorses you may have without much trouble. It stores easily too, I have two shelving brackets that I got from a remodeling job that I have hung high on a wall and the table just hangs right on them out of the way.The Woodworking Trip at http://woodworkingtrip.blogspot.com/.

An indoor bench

youtu.be/fV4WECYMX3s
http://chiefsshop.wordpress.com/2010/06/15/simple-woodworking-bench-video/
The instructions: ChiefsShopSimpleBench.pdf
list of lumber you’ll need:
Four 1 x 4 x 6 poplar boards
One 1 x 4 x 2 poplar board
Two 2 x 2 x 3 poplar boards
One 1/4 x 3 x 2 poplar board

Tuesday, November 13, 2012

Back Issues of WMN

Woodworking Machines News
woodmachining.com/backissues

Historical woodworking machines

whipsaw to up-and-down saw (the wisconsin logging book, 1839-1939)
(11 Pages)
making of a raft (the wisconsin logging book, 1839-1939)
(10 Pages)
famous log jams (the wisconsin logging book, 1839-1939)
(10 Pages)

Hammering Saw Blades

From Professor Gene Wengert, Sawing and Drying Forum technical advisor:
When a circular blade begins to spin, the outside rim wants to get longer. (Remember the ball you had that was attached with a rubber band and you would spin it and it would increase the spinning diameter?) With the blade, the metal closer to the eye will not let the outside rim expand in diameter. So, how can this outside rim get longer? An alternative to increasing diameter as the saw spins is to get wavy at the rim, which is what actually happens. (Note that this effect occurs progressively less as you move away from the rim.) In fact, there is a frequency at which the sawblade will actually create a "standing wave" along the rim. It is similar to what you might observe in a car antenna at certain speeds. To avoid this waviness, we can make the saw blade very stiff, but that means thick, which means lots of sawdust.
Another option is to hammer the saw blade so that when the blade is not spinning, the blade is dished slightly. (Hammering does not make a flat blade!) With a dished blade, as the blade beings to spin, the outside can get a bit longer and this increase in diameter actually causes the blade to come flat while spinning. Hence, when hammering a blade (sometimes hammering is called rolling or tensioning), one needs to know the amount of dish required, which means one needs to know the rpms that the blade will be working at. You cannot hammer without knowing the rpms.
Hammering is sometimes called tensioning the blade and you are putting in this dishing. If one were to check the ring that is heard when a blade is hit lightly, the flat blade (untensioned or unhammered) will be lower in frequency than a hammered (or tensioned or dished) blade. In fact, measuring the frequency is a quality check when rolling a blade.
Incidentally, this wobble is why we have difficulty using thin kerf blades and why as the rpms drop when sawing, the cut can actually get poorer.
Also note that heat will destroy the hammering or tension. So, a blade that is accidentally heated will possibly cut poorly it the future.
There is another option to hammering and that is adding heat to the eye and cooling the rim. This is often done with band saws in sawmills. They have the same centripetal force issues and resonance. Larger band saws are hammered so that they are slightly curved, edge to edge.  
Getting rid of the heat that might be generated is indeed a key. That is why the saw teeth are a bit wider than the blade... to avoid rubbing and heat generation. Excess heat is conducted toward the eye, but oftentimes too slowly. One option is to apply heat at the eye, but this is seldom done. Note that a little bit of heat can be conducted away through a frictionless guide. I did once see a guide that had cold air pushed through the back-side to apply cooling to the rim (contracting it) and also providing a cushion of air if the blade deviated toward the guide. We also have electronic guides that use magnets to pull the blade one way or the other with computer controls to keep it running straight. With smaller saws, guides are rarely used.  
-------------------------
From contributor J:
Dr. Gene, I noticed a long time ago when running different blades on a 15" old time, regular, no frills, chop saw that I got the best cut with straight ATB blades. My supplier was out of straight ATB's once, so I bought an ATB with raker. This blade would tend to slide slightly when first engaging the top of the stock before straightening out and cutting the rest of the way fine. Unfortunately, this small initial gap showed when the joint was clamped, since the rest of the joint was mated properly and the "moon" could not close.

I took the blade back to the grinding shop where I bought it and the owner suggested grinding the rakers down to below the lower intersection of the two beveled teeth. Now when I cut, the bottom of the saw kerf had a center inverted "V" of stock sticking up which came to a sharp point just like a straight ATB without rakers. The top of the "V" was not lopped off like before. This not only eliminated the problem, but that blade cut better than the straight ATB's I had.
1) What exactly is the purpose of the raker? Is it to just clean the kerf of chips?
2) What height should the rakers be ground to relative to the intersection point of the ATB's on a cross cut saw?
3) Do you think the rakers were inadvertently left too high at the manufacturer?
4) Or do you think it was simply that my grinder did a better job grinding the teeth than the factory, and the raker height makes no difference?
Also, with regard to the rim expansion of say 15" blades, assuming there is not any heating problem, is that expansion generally consistent enough throughout the rim that edge grinding the teeth will result in a cleaner (smoother) cut given no change in the top to bottom or front to back angles?


From Professor Gene Wengert, Sawing and Drying Forum technical advisor:
The answer to #4, part 1, is most likely "Yes." Note that with small diameter blades, and with a large collar, the centripetal force problem is close to zero. The larger the blade, the higher the rpms and the smaller the collar, the more the problem.
A raker tooth is a specialized tooth that cleans up the cut after the other teeth have done their thing. For example, we often have 4 alternate top bevel teeth (ATB) followed by a raker that is flat across. If you are cutting through all the way, then the raker does little to help. But if you were cutting part way (like in a dado), with only the 4 ATB teeth, the groove left would have a slight rise in the center rather than being flat across the width. The flat raker removes this rise. The raker tooth is the same height as the other teeth, but making it slightly lower means that you will not have a perfectly flat bottom to a cut. Sometimes the raker is a tiny bit narrower, but it should never be higher or wider, as it is not really doing the main cutting job. 
 
carbideprocessors.com/pages/saw-blades/hammering-saw-blades
by Lowell Freeborn  
There are no mysteries involved in the act of hammering a saw.  However, you must know the basic principles and apply them conscientiously.  Saw hammering requires complete concentration on what you're doing.  The only way to learn how to hammer is to start with a knowledge of the basics and then proceed by trial and error until you understand what happens when you hammer the saw, in all areas of the saw.  The first rule to observe in hammering is very simple: do not hit a saw with a hammer unless you know exactly why you are hitting it.  The second rule is to know exactly what happened where you hit it.  If you concentrate on what you are doing, and observe these two rules carefully, hammering will gradually begin to make sense to you. It takes a lot of patience and a lot of time to learn the art of hammering.  For more articles on Saw Blades refer to our Saw Blade Index. 
You must also be aware that when you hit a saw with a hammer, you expand and stretch the metal.  It is impossible to shrink metal with a hammer.  The harder you hit, the more the metal expands.  The larger the hammer, the more effect it will have.  Also, the shape of the hammer face influences the metal expansion.  You have to start out realizing these factors, and then carefully observe all the results you obtain. 
This discussion will be centered around small diameter saws of 14" diameter or less. These small saws comprise 90% of all carbide saws in use today.  Small saws do not require much tension if any.  However, as a saw gets larger, the centrifugal force and the temperature on the saw's rim affect the body of the saw more, and create the necessity for proper tensioning. 
You must have the proper tools to do a proper job.  The first requirement is a test arbor equipped with a dial indicator.  The next tool needed is a straightedge.  With these tools, you can now determine if a saw needs to be hammered.  First put the saw on the arbor and dial indicate it for wobble.  Note the reading on the indicator, then turn the saw over and dial the opposite side.  This will tell you if the saw is bent, or has tension areas, and how much and where.  It will also tell you if the saw is dished over and not running on the center line.  Now use your straightedge to check for lumps and bumps. 
Now that you have determined that the saw does, or does not, need corrective hammering, you will need the other tools of the trade. 
You will need an 8" round anvil slightly crowned, a three pound dog face hammer, a two pound cross peen hammer, and two or three various length straightedges.  It is also advisable to have oil to wipe on the saw plate to help prevent rough hammer marks, and a piece of chalk to mark with.
 At this point a few common saw terms, and what they mean may help. 
  1. LUMP - This word is used to describe an area that is raised up on one side. In other words, a bump that is caused by a burned spot on the saw.  Most generally it can be visually detected before you straightedge it by being blue in color. 
  2. RIDGE -This is a sharper bump area normally caused by an actual bending of the saw, and is long and narrow. A ridge runs from the rim to the eye of the saw. 
  3. TWIST -This area is the same as a ridge except it twists the saw. It is also caused by opposite areas without tension.
  4. DISHED -This is self-explanatory and means that the saw is no longer on a center line, but has taken the shape of a dish. 
  5. LOOSE - A spot that shows light under the straightedge is said to be loose when referring to a larger area of the saw than a lump or a ridge. 
  6. FAST - Just the opposite of loose, or a large lumped up area under the straightedge. 
  7. TIGHT OR STIFF - These terms are used to describe an area that is straight or flat under the straightedge when the saw is being broke or bent over to check tension uniformity. 
  8. TENSION - This seems to be the mystery word used in saw hammering.  It is actually a very simple function in most carbide saws. Tension is very important in large diameter saws, but in small saws the amount required is so little that in most cases it is checked merely to judge the uniformity of the saw to correct for loose or tight areas.  Tension in a saw has to do with the equalizing of strain on the saw caused from the centrifugal force stretching the rim.  When the rim stretches it pulls on the body of the saw.  This is why the body must be stretched slightly so the rim has this stretch to compensate for.  Thermal expansion of the rim or hub and cutting strain need to be compensated for by tension.  If the saw does not bend with a uniform curve when broken at the center line, the tension is not uniform and the saw will have a high speed wobble. The amount of tension needed in small saws is not too great; thin saws do require slightly more tension than heavy ones. 
Now that you understand the terms used you are ready to go to work on the saw. 
The first step is to apply a thin film of oil on both sides of the saw.  Then locate and mark with chalk the lumps and ridges by using a straightedge.   This can be done easily by holding the straightedge against the saw and looking under the straightedge at a light source such as daylight or a neon tube.
A.   is the viewer
B.   is the light coming under a gap between the straight edge and the saw blade
C.   is the saw plate
D.   is a straight edge
E.    is a diffused light source


 hammering_saw_blades-1.jpg
 hammering_saw_blades-2.jpg

In order to level a saw, the lumps and ridges must first be hammered down with as few blows as possible.   When doing this you will stretch the metal over a larger area and cause a loose spot.  In the process of leveling down the bumps you also remove any tension that existed before hammering.  Practice and observation are the main essentials in doing this job properly.  
If you have removed the lumps and ridges and now find you have a loose area, you must mark the area of the loose spot and then direct your blows between it and the rim in order to stretch out the extra tension that exists in the loose area. 
If a tight spot is witnessed under the straight edge, you must increase the tension in the tight spot by hammering that spot on both surfaces of the saw to prevent dishing the plate and to put tension in the saw. 
The removal of these loose and tight areas must be checked frequently and can be readily observed by bending the saw, with the center of the saw as the fulcrum or point of break or bend. (See the illustration below.)  As you pull the rim of the saw down to bend it slightly you use a straightedge in your other hand and note the loose and tight spots. If a saw is properly fit up, the bend will be a uniform curve and will not show a curve on one side of the eye and a flat spot on the other.  Check it in six or eight places across the center of the saw.  A11 checks should show a uniform curve.  If not, the tight or loose areas will again have to be worked on.  Be sure to work both sides uniformly to keep the saw flat.
hammering_saw_blades-3.jpg 
hammering_saw_blades-4.jpg 
This indicates  a tight eye and
it must be stretched.
This indicates a loose eye and
the rim must be stretched.
When you break a saw you can discover a loose or tight eye.  Always hammer both sides or you will create a dish in the saw. 
When the saw is flat to the straightedge and breaks over with uniform curves it is then ready to dial indicate for wobble.  If your work was done properly, the saw will require very little additional work to get it to dial on the test arbor within three thousandths of an inch total dial indicator reading. 
The biggest problem a saw has is heat.  Heat in a saw is the result of friction.  When the rim of a saw is working in a cut, heat is developed by the cutting action and by the sawdust rubbing past the teeth.  This heat can cause the rim of the saw to expand and create a wobble.  The heat also melts the resins and pitch in the chips and causes them to deposit on the saw.  If there is not enough clearance between the plate and the tip, the gum will build up on the sides of the plate.  As this gum deposit enlarges, the gum will also rub the sides of the cut.  Now more heat is generated and all of a sudden the steel in one spot will get so hot it will actually turn red or blue.  This causes that one spot to swell up and the gum be burned off of it. When the gum is burned off, the blue spot will cool off and shrink back away from the cut.  After this point the saw is going to give trouble and must be hammered to run properly.  If people would keep their saws clean a lot of these problems would not happen. 
Let’s start by relating hammering to a band saw instead of a circle saw.
hammering_saw_blades-5.jpg 
This area will have to be hammered to stretch it.  In other words, the bump is "loose" and the flat area is "tight".  By hammering the tight area, you tension it the same as the loose area and the bump goes down.
hammering_saw_blades-6.jpg 
This piece has the bump in the middle.  First hammer the bump down, then hammer areas on both sides of bump until flat and uniform.  Again, hammer both sides of piece so the expansion will be uniform. 
Serious conditions in a saw body.
 hammering_saw_blades-7.jpg
A twisted saw with the ridge down the middle will have two tight areas that must be tensioned to remove the twist. Work both sides.
 hammering_saw_blades-8.jpg
Work this area first.  (Top arrow)

Work this area next.  (Middle arrow)

If a saw is loose at the eye in this area it must be removed by gradually working toward the rim. Both sides are a must. If you work the rim only, you will destroy the tension or pull it out of the central area where it belongs.  (Bottom arrow)
 

 hammering_saw_blades-9.jpg
Every saw is an individual and the hammer man is confronted with the problem of analyzing; where a particular saw needs work on it. This is why it is most essential that he know what he is doing. Every man cannot hammer. If you get frustrated you will never make it and had better give up.  In other words, use your head and keep your cool.

Wood machining (Saw hammering)

Wood Machining Institute, in Berkely, CA.
Wood Machining Institute
A FREE book (written by Freeborn) TO SAW HAMMERING is downloadable
here called carbide saw processing
It has a nice chapter on hammering
http://wayback.archive.org/web/*/http://www.cs4u.org/*
http://web.archive.org/web/20071116102319/http://www.cs4u.org/blades2.htm
 ....cs4u.org/cleaningsawblades.htm 
Carbide Saw Manual
Description: Thirty years later this book is still widely acclaimed by true experts in the tool field. Some of the information is a bit dated but the essential information is still accurate and clear.
Synopsis:

Lowell Freeborn is widely acclaimed as a genius in the tool industry. He started Systi Matic with Bob Budke and then went on to found Freeborn Tool. Among the many ways his genius manifested itself was in his ability to make very technical issues very clear while still being entirely accurate. His description of saw hammering is perhaps the shortest and clearest ever written.
Product Details:

· Paperback: 56 pages
· Binding: Wire-O
· Published: October 2006 http://people.musc.edu/~gormanj/Lowell%20Freeborn%20Carbide%20Saw%20Manual.pdf
click to view
 
===============================================
foley belsaw circular saw sharpener manual
Circular saw to bandsaw (the wisconsin logging book, 1839-1939)
Circular saw to bandsaw (The Wisconsin Logging Book, 1839-1939)
. same year. Automatic saw sharpeners for gang saws were offered for sale at least as early at June 8, 1880. Circular saws, despite their drawbacks. doing custom sawing for farmers, never had any need for more than a circular saw, and, as time went on, a thinner saw 224. circular saw started out small, not for sawing lumber, but for trimming and butting lumber already sawed by the up-and-down or muley saws. added to circular sawing with the introduction, some time in the 1870s, of the "double saw," that is, two saws, one on.

Book language: english
PDF pages: 10, PDF size: 3.45 MB
Report
==========================================
Carbide Saw Specification Manual
Contents, General Specifications, Saw Plates Concentricity, Outside Diameter, Thickness, Hardness, Saw Plates Flatness, Saw Plates Runout, Saw Plates Finish, Saw Plates Spline, Saw Plates Bore, Pin or Bolt Holes, Gullet Profile, Saw Plates - Carbide Notch, Strob Saws Slots, Carbide Tips Concentricity, Hardness and/or Grade, Size and Placement, Grinding, Brazing, Strob Saws Cutters, Equipment for Quality Control. [Read More/Order]
 
Braze Failure Analysis, Especially Failure Analysis
This book was originally written for a very narrow audience, those that braze tungsten carbide for tools. However it has found wide acceptance because of the wide use of pictures. As one reviewer in the automotive industry pointed out, bad braze joints look the same for the same reason no matter what the materials are. We will show you many of them and explain how they occur and how to easily and simply fix them. [Read More/Order]
 
Chisels on a Wheel (Reproduced)
Chisels on a Wheel by Jim Effner 1992, 199 pages, 231 Illustrations, 11 Chapters, 78 topicsThis is often described as the finest book ever written on woodworking tools and their use. It was written with the active cooperation of over forty of the finest tool companies in the world. The writers style is clear and it is very heavily illustrated. This book is widely used as a training document in tool companies. It is also very, very good for the small shop and individual woodworker. The original book is long out of print and copies are very hard to find. It can take months and cost up to $100 to find a copy. This is a copy of the original reproduced with and protected under the original copyright. [Read More/Order]

=======================================
Sawmill http://www.oldengine.org/members/jdunmyer/sawmill/index.htm
Sawmill bladeTension  http://www.oldengine.org/members/jdunmyer/sawmill/sawblade.htm
Filers forum http://www.thinkerf.com/filers.htm
Download
Balance saw  http://www.fpl.fs.fed.us/documnts/fputr/fputr12.pdf
Formulaes on  speed and kerf
http://www.thinkerf.com/Downloads/FormulaSheet.pdf
----------------------------------------------------------
http://groups.google.co.in/group/rec.woodworking
http://groups.google.co.in/group/rec.crafts.metalworking
================================
http://www.forestryforum.com/board/index.php?topic=13297.msg188718#msg188718

http://www.sawyersandfilers.org/index.htm
Go to their links page and you will come up with a couple of saw doctors.  Casey Cramer writes articles in the Northern Logger about circle saws.  He seems like the kind of guy that would give you all types of information about seminars, schools and where to get tools.
http://www.senecasaw.com/
http://www.northeastsawfilers.com/index.php
There are a series of books printed in 1923 (Audels carpenters and builders guide 1 thru 4). There are 4 books in total and book 1 chapter 13 has 30 pages on circle saw blades.
------------------------------
book in pdf that is all about running a circular mill.  It has a section on hammering blades.  If you would like I could send you a copy.  The book is called Circular Sawmills and Their Efficient Operation.
http://www.fpl.fs.fed.us/documnts/misc/circsaw.pdf
-----------------------------
 www.leevalley.com
owwm.com
 It has a section where you can find an old catalog from American. It has lots of kool pictures and discriptions of different parts and models. This helped me Identify my mill.
------------------------------
Re: circular saw hammering
I don't think a ball peen hammer is the correct hammer for any hammer job, not to say it wouldn't work in a pinch.   There many different kinds of hammer weights and face types, all for specific uses.    I am very consious of the safety factors having heard stories of mishaps.
------------------------------
I have purchased a $250.00 doghead hammer, a circular blade mandrel with gauge, and a saw hammering table. Still need an anvil, a cross face hammer, and a tensioning gauge. So as you can see, I'm trying to learn this correctly. I am sure sawyers have done alot of things to get them out of a bind, but from my research it gets pretty complicated
------------------------------
Guy that taught me how to saw on a Corley mill, 52" blade, hammered right on the mandrel. Tools ???, a 6# sledge with short handle, a 4# engineers hammer, a BALL PEEN, a carpenters framing square, and a yellow keel. I forget now, just what he was looking for, but, my saw stood at "RIGID" attention, when it got up to speed.

  I started out with a blistered 48" saw, and he showed me exactly what was wrong, and that it would never be right again. He hammered it to get my mill going, and we sawed for 2 weeks as it started waving more and more.
  Bought a good used blade and hammered it to fit my power, and never looked back
------------------------------
No need for a string on the headblocks.  To set the lead, loosen up your saw guides, so there isn't any pressure on the saw.  Measure the distance from the saw to the headblock.  Mark the tooth on the saw.
Move the carriage to the opposite side of the saw.  Turn the saw so you are measuring on the same tooth.  Measure that distance.
You want the back side to be a little longer than the front side (where the saw guides are at).  Distance to start at is 1/16".
You will find that the way you file a saw has a lot to do with how the saw performs. 
------------------------------
 
The saw hammering class was a great success. It was about 8 hours long. The covered everything. Had a great instructor who has been pounding saws for a living for 32 years. There were about 30 people three, but only two for the circular saws, everyone else was there for bandsaws. I had a hard time taking pictures because of the Amish students. I asked about pictures, but the Amish said they didn't want there pictures taken.

Ckeck out the grooves wore into the test arbor from doing check thousands of circular saws. The manilla folder is to cover the anvil for leveling blows. It is then removed for trnsioning blows.

I never knew bandsaw had to be leveled and tensioned. They went over everything on bands..welding, retooth,repairs, leveling and tensioning, stelite, forging teeth, gumming and on and on. they had 200 blades there waiting to be done. I will put more band pictures on my gallery

--------------------------------

------------------------------
I actually want to learn every detail of SAW tensioning from theoretical and practical aspect.  I am in INDIA .Woodcutting is not at all an Industry here; like Canada , Australia / Newzeland, so expert  Sawdoctors  in this field are not available.There is no sawdoctors institute here.  I am a mecanichal engineer and I have a company  producingSTEEL CUTTING CIRCULAR saws dia 1000-2200mm (40'' - 80'), thick 10mm   used only in steel rolling mills. Our saws do not require tensioning as these are machined and  well ground. Our sawdoctors know only Saw straightening or levelling by big hammer (10kg) and straight edge/light gapping method. Now suddenly i need to learn this Saw tensioning method for reasons described at the bottom.
1) What should be the size and shape of the hammer for tensioning a 70 inch steel saw 10 mm thick made of alloy steel..
What is the formulae you use to find out required tension in  a saw?
2) How tension is measured by tension gauge in a big saw?
please name a few tension gauges.
3) How the hammer blows are appiled ? Can i use a PENCIL like tool inbetwwen the hammer and saw to increase the amount of blow.
Are hammer blows are done contimuasly in periphery or in one spot and the next on the digaonally opposite spot?
Someone told me that These saws are tensioned by small DOGFACE hammer
of 2kg on a CHILLED ANVIL ie hard anvil.
4) Is there any SAW TENSIONING HANDBOOK discussing the subject from zero?
5) Have you ever used any heat resistant Coating to reduce vibration of the saws??
6) Are there any Machine driven hammers to apply tension?
One of our customer have fixed a Computer driven Vibration meter and they require it tensioned.Not only that they require it to be tensioned by hand as ROLL TENSION MACHINE or STRECHING machine tensioning are destroying the quality of blades. [blades are special heat treated blades]
I am doing some Theoretical calculations-  i need to learn all  theoretical details of the TENSIONING.I want a book which describes the tensionig method from a theoretical and practical viewpoint from zero .
Some of Engineering idea
Amount of  Required tension depends on several aspects  like
a) TEMP Gradient  ASPECT 900-1500 DEGREE C 
(in this case )
b) ELASTICITY aspect or tension and leveling
[elasticity includes eccentricity and Tension ]
c) Rolling machine Engineering aspect.
d) Composition of Steel to be Cut
---------------------------------
you could try www.springerlink.com it seems they have the more technical aspect of saw tension. 
saw tensioning. One hit was author R. Szymani, who is now the Director of the Wood Machining Institute, and has a newsletter and software about design and tensioning saw blades, circular, band, large and small. 
------------------------------
hammering to a certain speed..is the amount of speed it takes to pull the tension out of the mid radial area. As the saw gets up to speed the rim area wants to strech do to centrifugal force. You have to prestrech the mid radial area, so that when this happens the blade will run straight and true.
-------------------------------
my saw hammer dude.
He does roll them. And he does hammer them. And he does not do it with someone watching him, as he messes up.
He just "Goes by the feel" to get the RPM right. (what does that mean?)
Somehow, the alchemy of hammering blades has got to yield to the science of machines, and tools. The part of the story that I feel I have got right is that the blades are bowl shaped, when stopped. Then, as they spin up to RPM, they pop straight, with tension around the perimeter, held by centrifical force.
--------------------------------
in laymans terms.. 50 years ago, the latest thing in the woods was what we called a buzz saw. A 12 hp wisconsin mounted on a pipe frame with bicycle wheels and handles like a horse-drawn plow. Belt drive to a 32 inch circular saw stick ing out front. the blade could be turned vertical for bucking or horizontal for felling. Look in tom's gallery for some pictures. The blades would eventually become unstable and shake like a wet dog. I had a part-time job hammering these blades (for $5 a pop). An old master millright showed me what to do, and it worked. I had no idea why, just did what he showed me. No fancy tools, just a good heavy flat anvil, a 5 pound hammer with a slightly curved head, a piece of string and a piece of chalk. Lay the blade flat on the anvil and draw a chalk line from one side straight through the center across to the other side. repeat this 3 times evenly spaced, like cutting a pie into 8 even pieces. Use the string and chalk to draw a circle about 4 inches in diameter around the center of the blade. Move out 3 inches and draw another circle. Repeat the circles every 3 inches all the way out to the teeth. Now comes the hammering. Lay the blade on the anvil and strike the spot where the circle and the straight line intersect. 3 or 4 good licks with a 5 lb hammer. Start at the inner circle and work all the way around it, then move out to the next circle. When done, turn the blade over and do the other side.
I asked the saw doc "how do I know when I've hammered enough??" if it's not enough, the customer will bring it back " . I have some ideas now about what this does to a blade, but I ain't going there right now.
-----------------------------------
When the blade is stopped it should have no dishing, it should be flat [ level]. If your blade is dished it needs to be leveled. This is done on an anvil, as stated before, only with a cushion between the anvil and the blade. I use a piece of manilla folder. This way you are not changing the tension with your blows. The blade must be level, especially in the eye area, it must be perfect.
------------------------------------

In figure #28 they are testing for the amount of tension in the midradial area of the blade. Notice one man is lifting the edge of the blade so that the midradil area dishes, then the saw doc is tedting for the dish. this dish dose not show up when the saw is hung and at rest. dose that help ?

Yup, its helping. I was also looking at the cross-section depiction of the blade as well as the photo in fig 28. But apparently the tension is hammered into that area (midradial) without (before) pronounced dishing, unless some lifting of the rim edge.  Thanks, and to jdunmyer as well. ------------------------------------
I tried my hand at hammering a saw blade or 2, without much success. Bought a tension guage & doghead hammer, built a hammering horse, and found a suitable anvil. But, it ain't as simple as it might appear, or surely wasn't for me. Did have the opportunity to watch a guy who was pretty good, but that only convinced me that I'd as soon pay someone as try to learn the art.
The saw isn't bowl shaped, but it does drop between the center and the rim when laying horizontal. The trick is that you lift one side, letting the saw rest on the opposite side, and lay the tension guage at 90 degrees to the line between your [lifting] hand and the resting point of the saw. It will have a slight bow between the center and the rim. Test all the way around the saw, on both sides.
The message about marking the saw radially and with concentric circles is correct, from what I remember, and it must be done on both sides of the plate. Hammering is done equally on both sides, and you don't just bang away. It takes surprisingly little work with the hammer to REALLY affect the saw, and the hammer is nowhere near 5 pounds.
------------------------------------
About 10 years ago at the Steam-Up at Brooks Oregon, an old timer was showing how to "hammer saw". He had a box full of gages that were for saw diameter and saw speed. These gages were like the edge of a large diameter circle, I would guess that they could have been 30 to 40 ft in diameter or larger. He also had straight edges that he used to repair saws that had been damaged before he hammered them for speed.
This old man was very skilled in how he used the hammer, he knew just were to hit the blade to get the correct results. I would say that it takes years to get this kind of skill.  I don't know if gages were shop made or bought, I could see no name on them.
--------------------------------------
We are very  recently using Hammers for some of our clients requirements.
We are using DOG HEAD, FLAT HAMMER, BALL PEENS (1 kg to 10 kg) but never use cross peen.
--------------------------------------

My 12 mm Thick saws are called cold saws/hotsaws made of
Hi-speed steels ; used in Steelplants to CUT steels.
Thick 10-12 mm
DIA 1500 mm
RPM  1400 RPM
TEMP  during cutting 900 Degree C.
It is very difficult to find out the actual tension in the saw
as Tension gauze cannot be applied , as saw cannot be
bended.Sometimes we tension it with calculations with Only Ball peen
hammer and straight edge. And also we tension it with rolling machine.
I donot use a cross peen hammer. What is the actual purpose of it ?
--------------------------------------
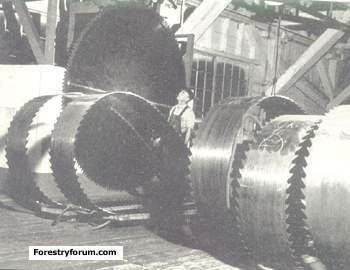
those are some very thick sawblades! :o  I am surprised to learn that tension is even an issue with them.  The ones we use are for cutting wood and are only about one third of that thickness.  Many of them are of 2 to 3 times that diameter as well, so they depend upon centrifugal force to  make them run true.
A ball-pein hammer expands the metal in all directions at once, so it is useful in doing things like hammering a saw.  A cross-pein, on the other hand, only expands the metal in a direction perpendicular to the pein, so it is useless in hammering saws.
Keep watching for more answers to your questions.  Though we are woodworkers, a lot of people here also work with steel.
--------------------------------------
Cross peen hammers expand metal in one direction.
I understand from your comment  how it is creating tension.
Hitting the rim with a cross pin hammer {presently  we do it with a Small 1 kg ball peen hammer} keeping the saw on an anvil causes deformations and block marks on the rim.This  pushes the material inside and causes inward tension. Marking the saw rim in this way
continuasly (ie for 1400 x 3.14 periphery 500 such markings) gives very appropriate tension for us.
I will try to develop a Cross peen tool with a slant on one side and also
not square but trapeziodal.   
  ___
/ ___ \
    Tensioning is required for Steel cutting hi speed saws as VIBRATION and NOISE takes place otherwise.
This is a sign of ill functioning and it ultimately breaks the gearbox of the machine.
It also reduces the saw life abruptly.The vibration is measured by
Computer and suitable softwares throughout while operating.
 Recently we had to learn everything thing about 'Saw tensioning by hand'

Tuesday, October 30, 2012

DIY Table Saw Mobile Base

http://www.ehow.com/how_7646566_diy-table-saw-mobile-base.html

DIY Table Saw Mobile Base thumbnail
A mobile base for your table saw will optimize your shop space.
Making a mobile base for your table saw can be an inexpensive project with the most costly item being the locking swivel wheels. Mounting your table saw on a mobile base can make a small workshop more versatile and optimize your shop space. With your table saw on wheels, you can move it outside for projects in the yard or you can store it out of the way when not in use. Build a mobile base for a table saw, complete with a metal stand. Does this Spark an idea?

Things You'll Need

  • 2 inch by 4 inch lumber
  • Measuring tape
  • Drill
Show (6) More

Instructions

    • 1
      Measure the distance between the feet of the metal stand. For the frame of the base, cut 4 pieces of 2 inch by 4 inch lumber one inch larger than the length and width of the bottom of the metal stand. For a center brace, cut one piece of 2 inch by 4 inch lumber the width of the base frame.
    • 2
      Make half lap joints at the ends of the lumber for the frame. Mark one side of the ends of the 5 pieces of lumber to the width of the 2 inch by 4 inch lumber and half the thickness of the lumber. Use your table saw or radial arm saw to make a series of cuts half the thickness of the lumber, starting at your pencil mark and moving to the end of the lumber. With a sharp chisel, remove the cut wood to make the joint smooth. For the center brace, measure the center point of two opposing sides of the frame and mark the width of the 2 inch by 4 inch lumber and half the thickness of the lumber. Use the same technique for the overlapping joints as you did for the ends.
    • 3
      Fit the pieces together dry to make sure the joints are flush. Separate the pieces of the frame and apply wood or carpenter's glue to both sides of the joints. Fit all glued joints together and use a carpenter's square to make sure the frame is square. Clamp the joints in place with C clamps and let dry. After removing the clamps, use a 3/32 inch drill bit to drill four screw pilot holes into each joint ½ inch from each side and secure into place with 10 by 1 ¼ inch wood screws.
    • 4
      Cut four pieces of 2 inch by 4 inch lumber 8 inches long for corner braces. Cut a 45 degree angle on both ends of each piece of lumber. Apply glue to the angled face of one piece of the lumber. Fit the glued brace on the inside of one of the corners of the frame and clamp into place. Use a 3/32 inch drill bit to drill two countersunk pilot holes in each end of the brace and into the side of the frame. Secure it into place with 10 by 2 inch wood screws. Repeat with the other three corners.
    • 5
      Flip the frame over. Set the heavy-duty 2 inch hard rubber locking swivel wheels into each corner of the frame ¾ inch from the edge. Mark the screw holes for the wheels and use the 3/32 inch drill bit to drill pilot holes. Screw the wheels into place. Turn the frame over and lock the wheels. Set the table saw on the frame and screw into place.

Tips & Warnings

  • Make sure you buy good quality heavy duty locking swivel wheels so you can easily maneuver the table saw with locks that will secure the table when it is in use.

Read more: DIY Table Saw Mobile Base | eHow.com http://www.ehow.com/how_7646566_diy-table-saw-mobile-base.html#ixzz2AnjGmJrv

Ultimate tool stand

Ultimate Tool Stand - Exploded View & Electrical Connections
Building the Ultimate Tool Stand
- Building the Ultimate Tool Stand (continued) -
Special Features - Special Features (continued)

by Dave Munkittrick


An easy-to-use
space saver
with more
functions than a
Swiss army knife.

For those of us who share shop space with a car or a washer and dryer, elbowroom is always a problem. This tool stand is the answer. A 2 ft. by 6-ft. section of floor space is all you need to store it. When you're ready to work, just roll it out, lock it down (these casters won't budge) and plug it in. It not only stores three benchtop power tools, it provides a working platform that actually improves their performance. In seconds you can shift from a chop saw station to a huge router table and then to a portable planer stand with infeed and outfeed support. 

A dead-flat torsion box is the foundation of this tool stand. This torsion box is a sandwich made from two skins of medium-density fiberboard (MDF) and a grid core (Fig. A). It offers incredible strength and resistance to sagging. It simply won't twist out of shape no matter how uneven your shop floor is.


Downdraft Sanding Table

Glue Up Table

Chop Saw Stand

Huge Router Table

Portable Planer Stand

T-Slot Clamping System

Outfeed Table

Monday, October 22, 2012

Holtzapffel workbench

www.wkfinetools.com/ holtzBench/Holtzapffel
Southern Yellow Pine
Building a Holtzapffel Inspired Workbench - Part 1 Building a Holtzapffel Inspired Workbench - Part 1
http://www.popularwoodworking.com/workbenches/schwarz-workbenches/free-drawing-the-knockdown-holtzapffel-workbench

Ever since we published plans for the Holtzapffel Cabinetmaker’s Workbench in Issue 8 of Woodworking Magazine, readers have requested information on how to build the bench so it could be easily knocked down and moved.
The version I built and published plans for in Issue 8 used old-world bench-building principles where the legs were tenoned into the top and the base parts were permanently drawbored. But when Kelly Mehler and I taught a class in constructing the bench last month, we decided to modify the plans to make the whole thing break down for easy transport. The students hailed from all over the country (Missouri, Alaska, Michigan), and so a portable version was necessary.
By the way, if you missed my daily blog posts about this class, you can find them over at the Popular Woodworking editor’s blog by clicking below.
Day 1: Sticks
Day 2: Glue
Day 3: Grit
Day 4: Gruntwork
Day 5: Grease
Day 6: Guessing
Day 7: Gone
This weekend my blisters from the class began to fade, and so I cleaned up the construction drawing and cutting list a bit , you can download them for free below.
Here’s how the knockdown construction works in a nutshell: The workbench’s base is made up of two end assemblies, which are permanently glued and drawbored, plus two long stretchers.
Compared to the original design, the only changes to the end assemblies are that the legs don’t have tenons on the top and you need to add a 3″-wide top stretcher to each end assembly. These top stretchers will help you attach the base to the benchtop.
The base’s long stretchers are significantly different. The long stretchers have short tenons and are attached to the end assemblies with 1/2″ x 8″-long hex-head cap screws, washers and nuts. All in all, the base’s joinery works a lot like a traditional bed.

The assembled joint that shows the cap screws in place and the plywood template.

The disassembled joint that shows the short tenon on the long stretcher.
To install the cap screws, drill 5/8″-diameter holes through the legs. Then rout out slots for the nuts and washers in the long stretchers using a plywood pattern, a 1/2″ spiral bit and a guide bushing (see the photo for what this looks like). With the slots routed, install the cap screws, washers and nuts. Snug everything up with a socket set and box wrench.
With the base assembled, attach the workbench’s top to the base with 3/8″ x 5″-long lag screws through the top stretchers in the end assemblies. We used four lag screws per bench. The screws at the front of the bench were in 3/8″-diameter holes. The screws at the rear of the bench were in 1/2″-diameter holes, which allows for wood movement.
Everything else about this bench is identical to the plans found in Issue 8.
Holtzapffel_KD_Bench.pdf (52.91 KB)
-------------------------
If Roubo and Holtzapffel Designed Workbenches


Reader Wendell Wilkerson is designing a workbench and has combined elements of the Roubo-style Workbench from Issue 4 and the Holtzapffel Workbench from Issue 8. I think it looks a lot like the Dominy workbench at Winterthur (if you took off the iron end vise). He has a couple good questions, which are below, but I also wanted to share his Google SketchUp drawing above and give you a link to a SketchUp drawing of the Holtzapffel. Plus, Wendell has graciously agreed to post his SketchUp drawing of the bench shown above:
roubzapffel.zip (691.62 KB)
Question: I always knew procrastination would pay off someday.  I never got around to building the Roubo bench.  If I had, I would’ve have been upset after seeing the Holtzapffel bench. I was always drawn to benches with twin-screw front vises, and the Holtzapffel bench finally clinched it for me. I ordered my wooden bench screws pretty much as soon as you posted Stephen Fee’s e-mail on WoodCentral. Luckily for you, I used my tool allowance to buy them so WivesAgainstSchwarz won’t be getting involved, this time!
Anyway I put together a Google SketchUp model of what I want to build. I am planning to use Southern yellow pine (SYP) for the whole bench so I married the Holtzapffel top and vises to the Roubo base. Assuming I get 1-1/4″-thick boards of the SYP construction lumber, the Roubo base dimensions looked easier to put together. I will freely admit that I wimped out and decided to add upper end stretchers to the base so I can screw the top to the base rather than mortise it. In putting the model together, I came up with some questions:
Question 1: My main concern is the vise I plan to use for the end vise.  I have a 7″ Record vise that I bought when Lee Valley was closing them out. Do you think there would be any issue with using this vise instead of its larger sibling that you used? In my drawing, I worked out a chop size that would avoid the dog holes going over the legs, but using 3-3/8″ spacing I couldn’t avoid the upper end stretcher I added. Related question: Which do you like better , the wagon vise you added to the Roubo bench or the end vise on the Holtzapffel?

Answer: On the end vise, a smaller vise is fine. Just do everything you can to keep the line of dog holes in your top as close to the front edge as possible. About 4″ is the maximum distance. Anywhere between 3″ to 4″ would be fine. I hope you can use a quick-release vise in that position because that is one place where a quick-release really shines.
As to the wagon vise v. iron vise question, I like the extra support provided by the wagon vise, but I like the quick and easy installation of the iron vise. Were I to build another bench (shudder), I’d use the iron vise in the tail position again.

Question 2: I am planning to make my bench 8′ long, 2′ longer than your Holtzapffel. With the added length, do think you think it would be useful to add the deadman back into the design? The nuts for the face vise block about one third of the distance between the front legs but there is about 38″ from the right end of the face vise to the right leg.

Answer: With the extra length of your benchtop, I would add the deadman back in, just as you’ve done on your drawings. That will be an awesome setup.
3) How much extra thickness do you generally add when you’re gluing up thinner stock to make your bench parts? I am particularly interested in your strategy for the top since reducing by hand is about the only option once it is glued up.
Answer: On the lamination question, I usually add about 1/4″ to 3/8″ extra in width to each board when laminating a top. That might be a little heavier than needed. But I’d rather end up with a slightly over-thick top. It will get thinner as the years progress.


- Christopher Schwarz

World's Best Folding Sawhorse

http://youtu.be/bGhATl5nsTs
Wooden professional quality folding sawhorses, portable saddle racks, folding saddle stands, world's best folding sawhorses, http://hideahorsefoldingsawhorses.com

DIY Workbench


http://youtu.be/lQWY7Pi4v-M
a basic workbench made with a few 2x4s and a sheet of plywood. It is very strong and can be customized in any number of ways.
www.WoodworkingForMereMortals.com

===============================
finewooodworking.com

A Simple, Sturdy WorkbenchWoodworking WorkbenchConstructed with 2x4 and 4x4 lumber, a single sheet of multi-density fiberboard (MDF), and some basic hardware, this easy-to-follow project results in a great first workbench that will last for years and accommodate just about any woodworking operation at the workbench. The free woodworking plan includes a supplies list and detailed drawings with dimensions.
DOWNLOAD THE WORKBENCH PDF
================================
http://www.workbenchdesign.net/rplansfree.html 
http://www.toolcrib.com/blog/2008/03/toolcribcoms-ultimate-guide-to-free-woodworking-workbench-plans
<iframe width="420" height="236" src="http://www.youtube.com/embed/ZXEvRoW8lY8" frameborder="0" allowfullscreen></iframe>