Ca. 160 €
http://metabo.de/Produktkatalog-handgefuehrte-Elektrowerkzeuge.23744+M571916762e0.0.html
http://www.werkzeugcheck.de/gebrauchte-handkreissagen-worauf-sollte-man-achten-1722/
Test

Heft 3/2008
Platz 2 von 10
Metabo KS 54
www.metabo.de/Produktkatalog-handgefuehrte-Elektrowerkzeuge.23744+M5414c3e591d.0
Technische Dokumentation:
www.metabo.de/index.php?id=16365
600540XX0.pdf [68.91KB]
Eine ausführliche Erklärung zu den Ersatzteilisten finden Sie hier
Metabo KSE 55 Vario Plus
Festool TS 55 EBQ
Mini Handkreissäge
Brennholzsäge
http://metabo.de/Anwendungs-Profile.29625.0.html
http://www.amazon.de/s?ie=UTF8&search-type=ss&index=diy&field-keywords=Wolfcraft
http://www.youtube.com/watch?v=YWX6xkJQtTA
Wolfcraft 4642000 Undercover Jig-Set
Wolfcraft 5505000 Transportsystem TS 600
Wolfcraft Dübelleiste für 5,6,8,10mm
Wolfcraft 6911000 1 Verlängerungs-Set für Führungsschiene
Wolfcraft 5206000 Universalwinkel, L=500mm
An die Serviceabteilung:
sehr geehrten D. u. H.,
habe eine KS 54 und damit seit eine Weile kein feiner Schnitt(Rattenmarken? durch ein Lagerspiel des Sägeblattes)
Die Werkstatt von Agencias Generales in Santa Cruz, die eure Marke importiert und Service anbietet hat nicht mal den Schalter zum Verkauf, desto weniger die Lagerkomponenten, da sie teurer im vergleich zum billigen chinesischen Lager wären...
Ich zerlege dann die Maschine und stelle fest, dass der wichtige Kugellager fuer die maschine ein chinesischer Billigprodukt ist...
Was für eine deutsche Schande! So billig mochte man die Gewinne steigern?
Gut... Der Vertreter eurer Marke Metabo in Santa Cruz hat keine Erfahrung in den Wechsel des Kugel- und den zusaetzliche Nadel-lager fuer diese Kreissage... Der Junge vom Service hat es nicht gemacht und wollte einfach mit der Druckpresse von der Seite der Nadel lager die Achse mitsamt den zwei Lager hinausdruecken. Da die abgebildete Explosionzeichnung eine groessere Abdeckplatte als die Nadellager zeigt, habe ich behauptet, dass die Sägeblattachse muss gezogen werden -mit Hilfe der Schraube an der Achse, dann die Deckel der Nagellager von innen gestossen werden, und so die Nadellager herauszudruecken oder stossen.
Der Leiter mischte dahin, das seine Werkstatt das Lagertauschen nicht machen koennte.. wegen der moegliche Anspruch meinerseits auf Ersatz des kompletten Teils, falls etwas schief geht...
Und diese Murxer haben das Recht auf den freien Eingriff in eure Datenblaetter-datenbank.
Ich bitte Sie, mir den Zugang der speziellen ServiceDatenBlaetter eurer Firma zu ermoeglichen (pdf oder andere digitale Dokumente)... um diese eure Murxer in Bolivien zu händigen und übersetzen, damit ich mit der Werkzeugeinrichtung dieser Servicewerkstatt meine Kreisäge mit (selbst gekauften) japanischen Lager austatten kann..
Ich erwarte dass Ihre Firma mir keine komplizierte Ausreden mitteilen wird und anstelle von dummen Service- und Repräzentanz-ausreden... einfach den freien zugang zu euren Serviceblatter mit den passenden funktionierenden Link in euren Webseiten ermöglichen.
Danke im voraus

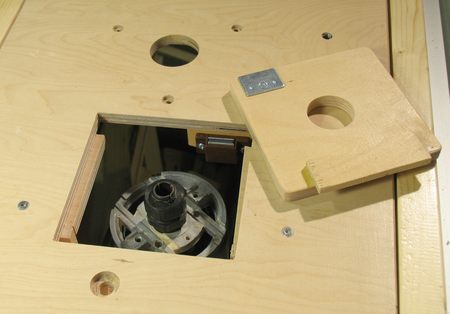
 My first thought was to cut the hole for the insert with a scrollsaw. If I used a fine enough blade, I would get a perfectly matching hole and insert in one go, even if I didn't cut it all straight. But getting the shape right for any additional inserts would be much harder.
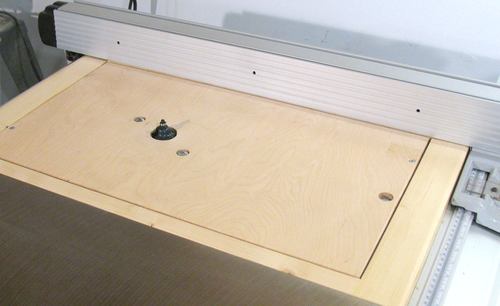
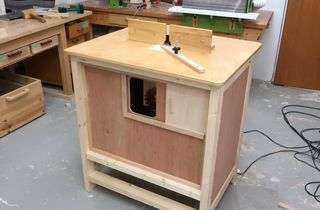
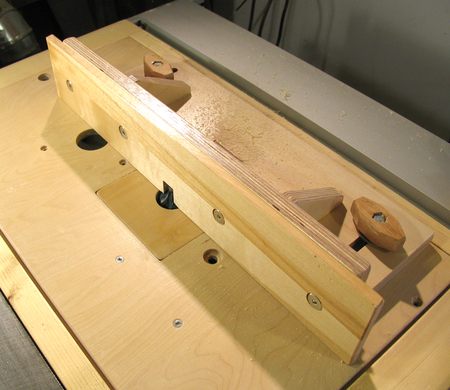 I also built a fence to attach to the top of the router table. I had previously always used my table saw fence to hold a
 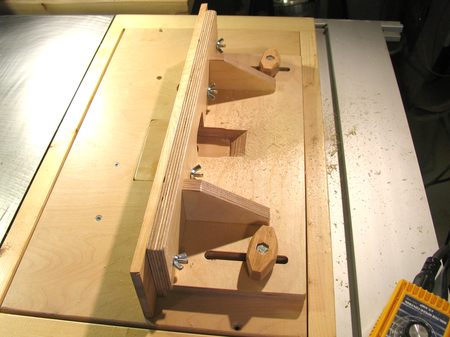 The fence is held down by two screws, which go into T-nuts on the bottom side of my table. The sacrificial fence is held to the front with some screws held with wing nuts.
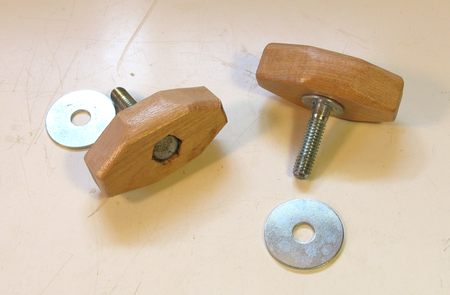 The knobs are just hex bolts mounted in pieces of hardwood. The heads of the bolts are mounted in holes that I chiseled hexagonal to match the screw heads. I also glued a small washer to the bottom of the knobs. A larger washer in turn is used to span the slots that the mounting knobs go through.
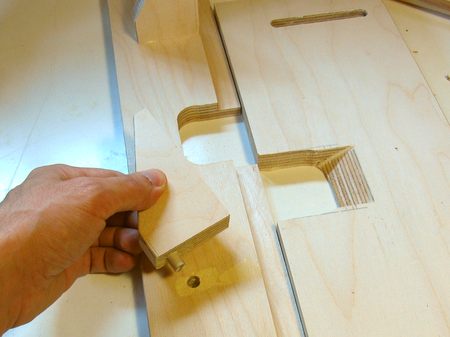 The router fence itself is joined relatively simply. The base is rabbeted into the front side, and the two braces are doweled into the front with just one dowel, and butt joined to the base. I don't expect this fence to get a lot of abuse, so I figure the butt joints should hold.
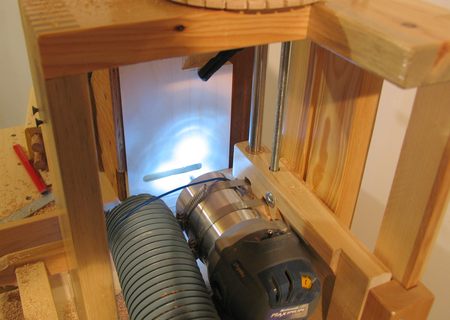 I cut the slots for the knobs with my home-made slot mortising machine. I'm very proud of my
 The only other slightly tricky aspect of the router fence is the bevel I cut into the base at the back of the cutout for the router. I figured if I beveled it at the back, it would be easier for the router to eject the chips out that way, without them getting stuck. I cut this bevel by passing the cutout slowly side to side across my table saw blade, moving my work piece forward by about a millimeter each time.
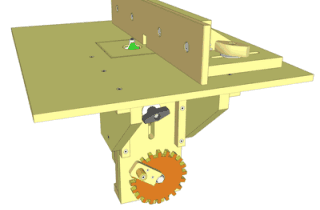


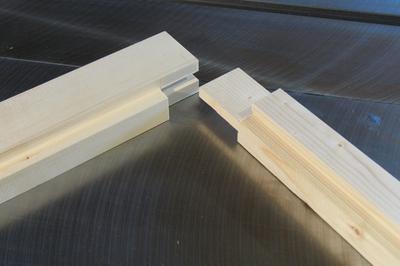 I built the frame out of spruce from 2x4's. The corners are joined with a simple double lap joint. The picture at left shows the joint before gluing.
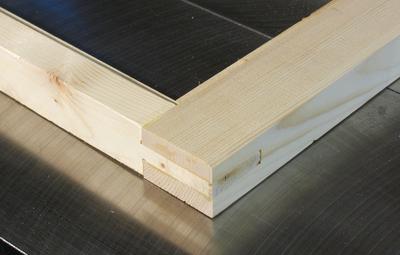 The lap joint assembled, and trimmed to size. I made the pieces so the frame would be slightly larger than needed, so I could cut the frame precisely to size and the joints flush.
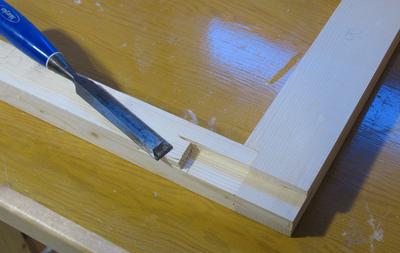 To support the frame vertically in the fence rails, I cut away part of each corner on the bottom side of the frame, so I could screw small pieces of maple in to have them extend into the slot on the fence rails. I guess I could have made this an integral part of the frame, but by making it a separately screwed in part, I could still shim it up to bring it exactly level with the table.
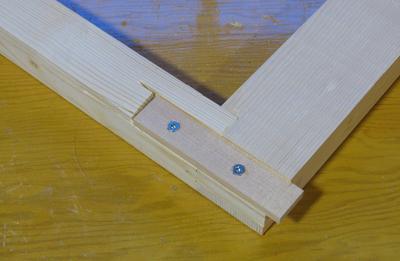 And with he piece of maple screwed in. The piece of maple extends only a little past the frame, as the slot in the aluminium rail is not that deep.
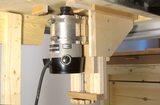
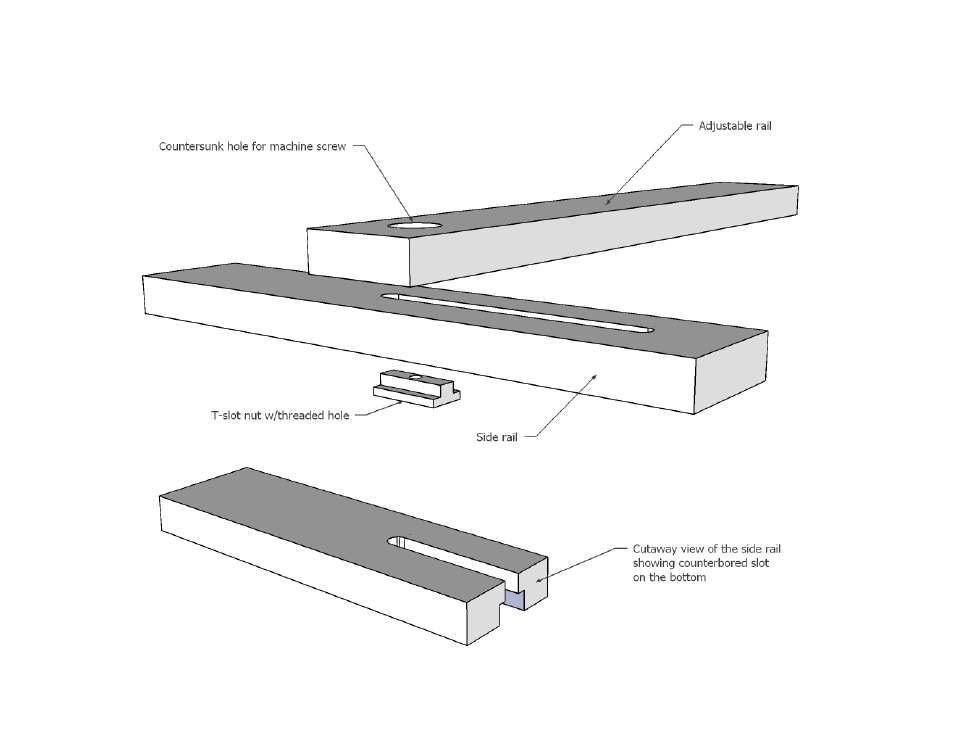
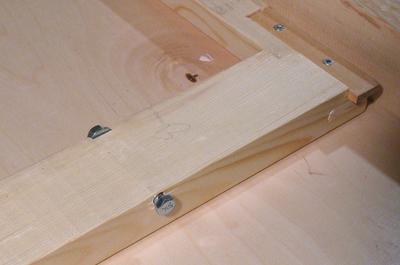 I also added a bolt to lock the frame against the fence rails. The bolt head on the nearer side slides into the fence rail. The gap in the aluminum rail is just narrow enough to keep the bolt head from turning.
 Shown at left is how the bolt head fits snugly into the aluminium rail.
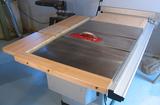
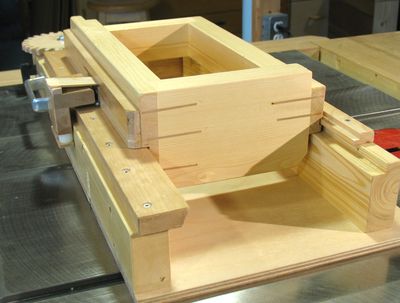
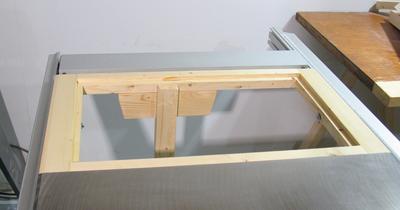 And here the frame is mounted on the saw. I also added a leg to the frame to support the extended table.
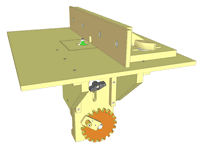
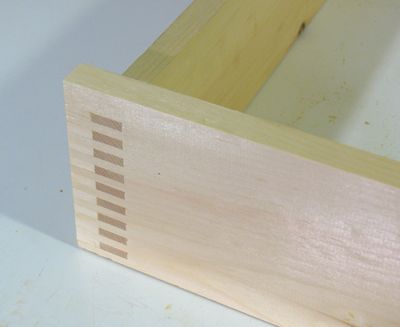 A traditional method of joining the drawer front to the sides of a drawer is to use a rabbeted dovetail joint. This is an elaborate and time consuming joint to cut, even with a dovetail jig. On top of that, a dovetail joint is
 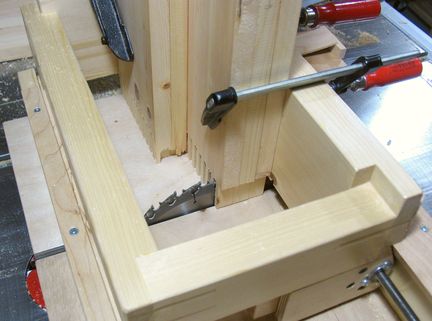 But with my fancy jig, I can safely and accurately cut box joints that are quite deep. This enables me to make a bit of a T-joint for the drawer front.
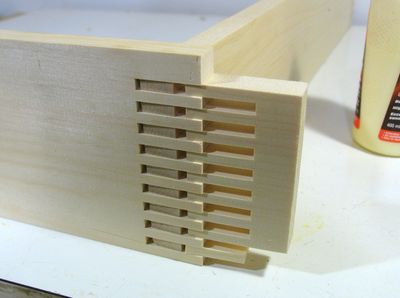 With the slots cut very deeply, the fingers stick out way beyond the corner joint, and I can then just use another scrap piece with fingers cut into it to fill the gaps. The image at left shows a test fitting of this.
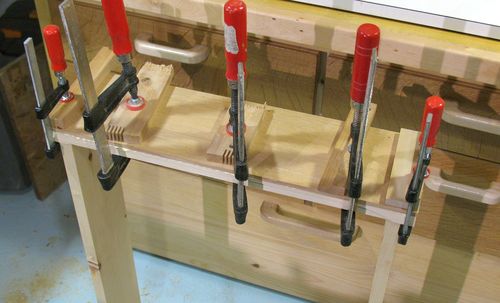
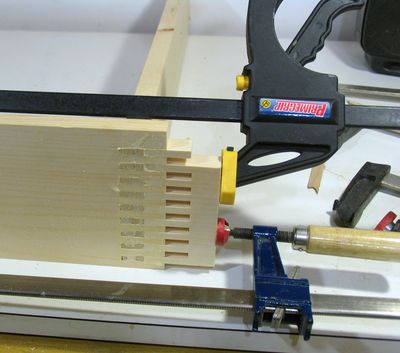 Having the extra piece with the fingers in it is actually quite handy for gluing the drawer together, as it's a convenient spot to put a clamp on, without getting glue all over the clamp.
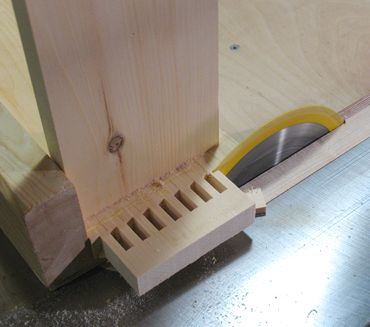
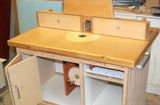
 Although the drawer front looked kind of intriguing as it was, I wanted the drawer face to be made of hardwood. I had some nice pieces of white oak that i had been saving, that I
 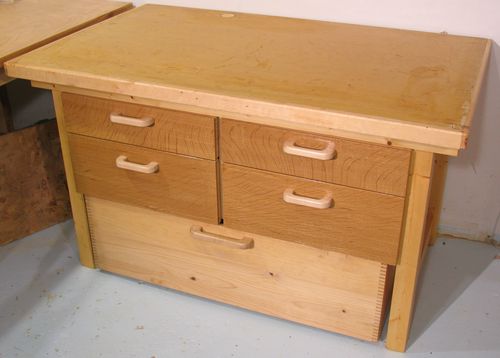 I used this same method of construction for the four upper drawers of this workbench.
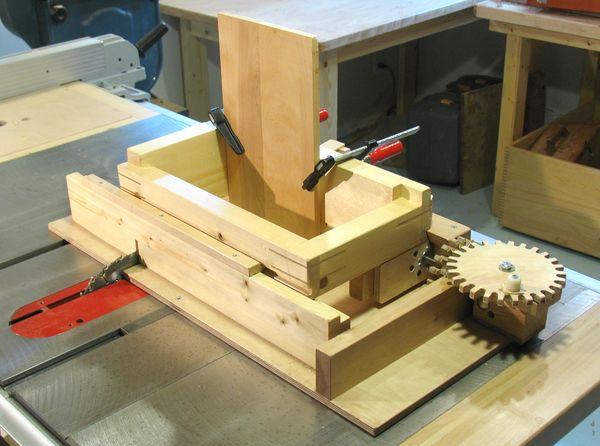
 The jig consists of a sort of table saw sled, which has a metal bar mounted to the bottom of it for sliding in the table saw's slot.
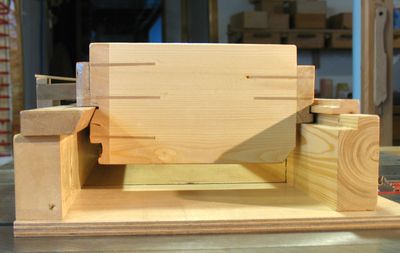 The carriage slides on a sort of half-dovetail, which is on the operator side of the jig. On the other side, it just slides on a simple square slot. A spring loaded roller keeps the carriage pushed into the wedge of the half dovetail, so that the position of the carriage on the sled is consistent and precise.
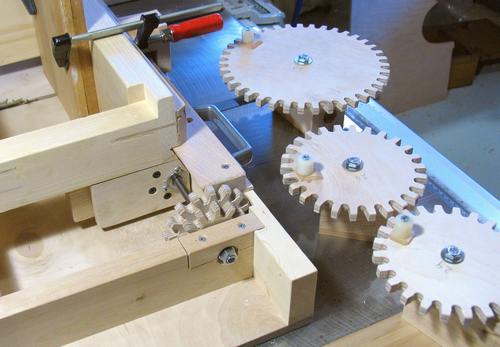 To allow for different amounts of advance per turn, different set of primary gears can be swapped into the jig. There are also two sizes of gear on the screw shaft, one has 12 teeth, and the other has 16 teeth. That way, I have more combinations that I can use to get different spacings.
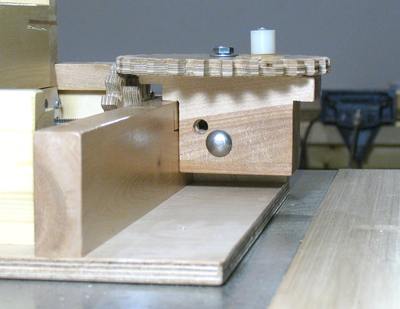 The image at left shows the gear block, mounted in place with a carriage bolt. If you mouse over the image, it shows the gear block in the lower position. The gear block is shaped such that it fits nicely in two positions.
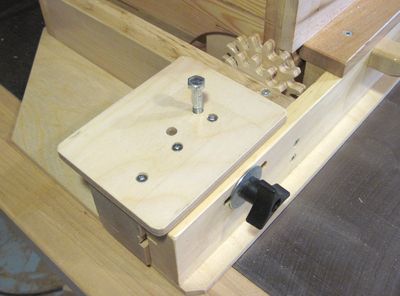 I ended up making a lot of primary gears for my jig and eventually came up with a better method of mounting the gears for my
 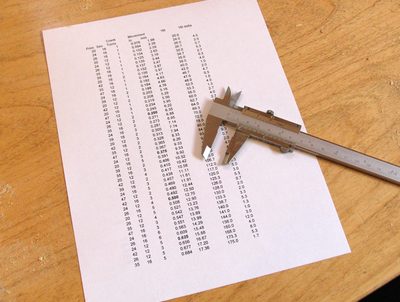 To get different spacings, I can pick one of a number of primary gears, and mesh that with the 12 tooth or the 16 tooth secondary gear, and decide how many turns to turn per advance. If I want a particular advance per cut, it makes it difficult to figure out which combination of primary, secondary, and turns per cut gets me closest among the gear sets I already have. So I worked out all the combinations of primary gear, secondary gear and turns on the crank. I worked out the advance for each combination, and made a sorted list of these. Now, if I want a certain spacing, I can just look up on the spreadsheet to see how close I can get to that spacing with the gears I already have before deciding whether to make another gear.
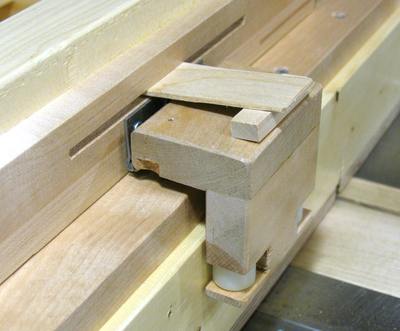 Alignment of the jig works by continuously pressing the carriage part against the half dovetail on the operator side of the jig. This is done with a set of pinch rollers, which always pull the carriage towards the operator side and into the half dovetail rail on that side.
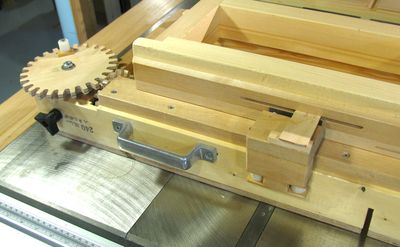 I mounted a big drawer handle to the operator side of the jig. The first time I used it, I realized I didn't have a good place to grab the jig to pull it back after making a cut. The handle in that position is a good place to grab, and it's far enough from where the blade goes through the jig to be safe.
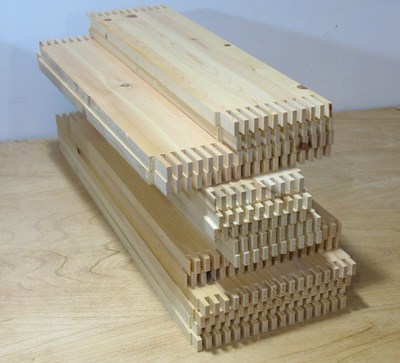 One of the first projects I built using this jig is some drawers for one of my workbenches. I made four drawers, and joined all the corners with box joints, which made for quite a lot of fingers to be cut. Most of these I cut with a stack of four boards in the jig at one time. The fourth photo in this article is actually of these boards being cut.
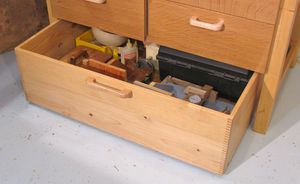